
|
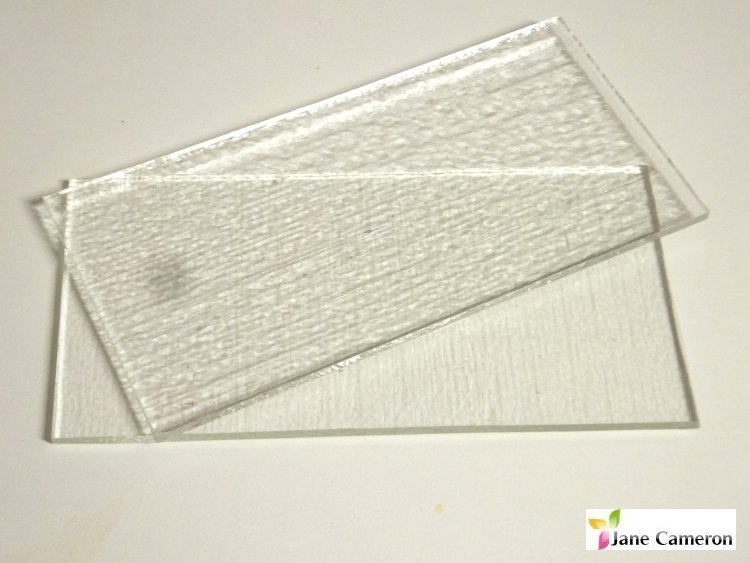
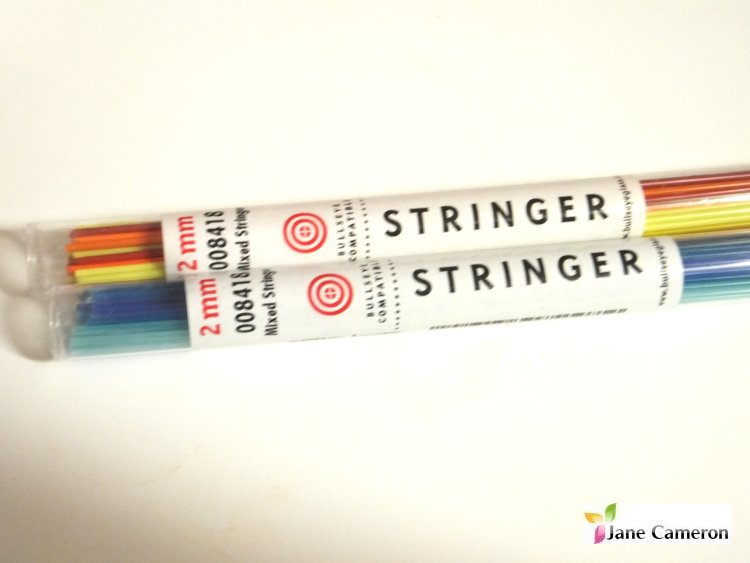
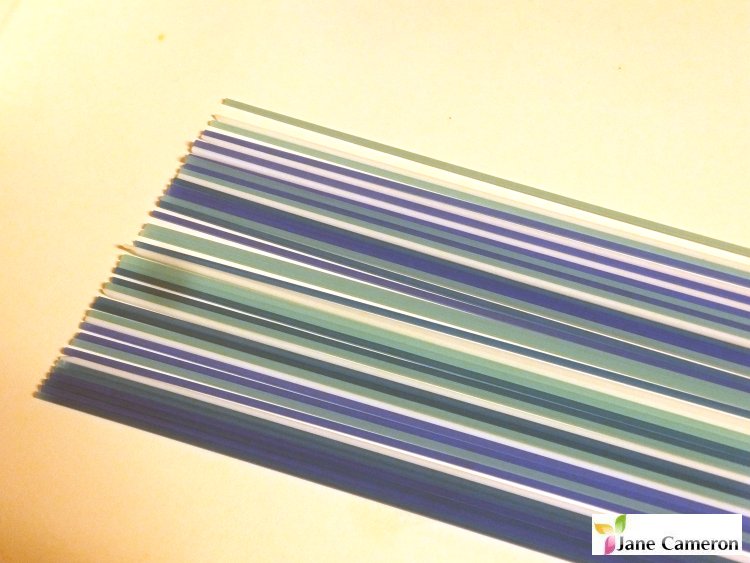
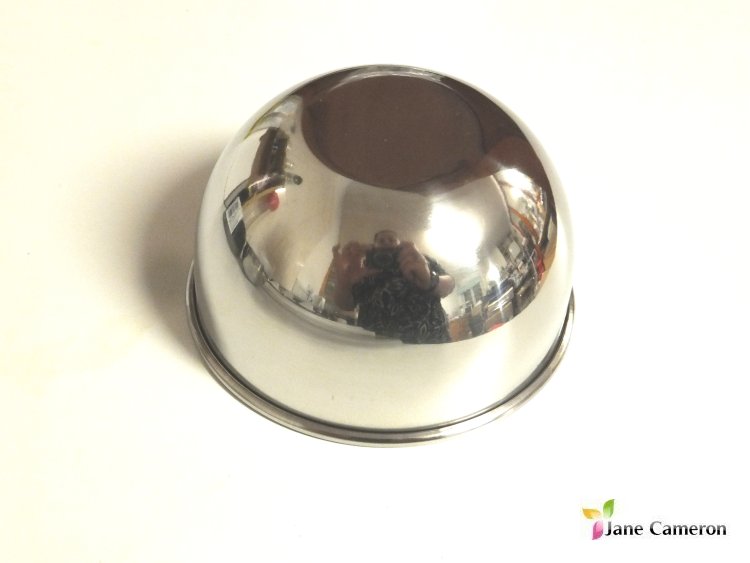
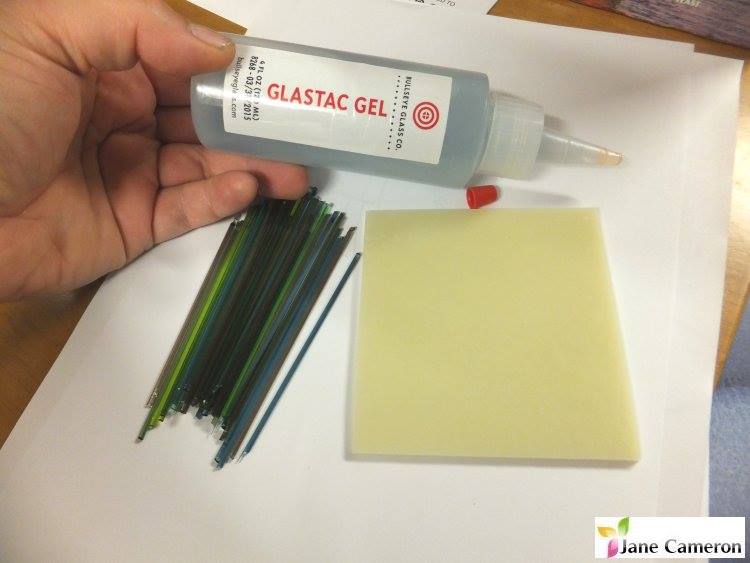
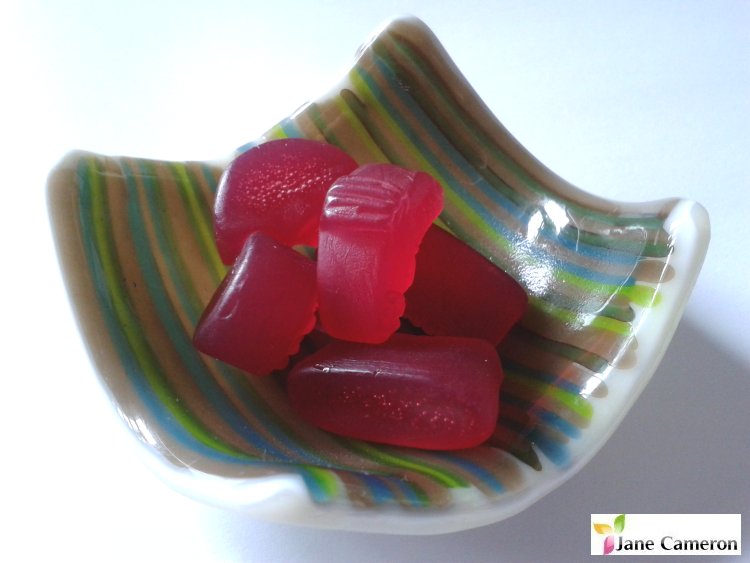
I was recently asked how to create a fused glass handkerchief style stringer drape vase ... so thought I'd share it with you :) This free tutorial may be helpful to those who work in fused glass, and will hopefully give some of you non-fusers a bit more of an insight into some of the processes involved in making these gorgeous pieces. Handkerchief drape vases aren't a core part of my repertoire, but I thought it would be a fun project to share :) IMPORTANT NOTE: Please feel free to use this tutorial to make items to sell, should you wish to do so, and to print copies for your own use. If you want to share this tutorial with your friends, please point them at this blog post. If you would like to use this tutorial with your students, please contact me. Thank you! DISCLAIMER: This tutorial my own creation, is not based on any other specific tutorials, and is not intended to be a step by step tutorial. I accept no liability for artwork which doesn't turn out as you hoped. There are other more detailed tutorials by other artists available to purchase, should you wish to do so, or you could go on a course and support my wonderful glass colleagues that way too! Copyright Jane Cameron 2016. How to make a Stringer Drape Vase You need a cocktail shaker (stainless steel) or similar shaped object (or a proper drape vase mould, available from glass fusing suppliers - these last much longer than cocktail shakers and are much thicker and better quality stainless steel), some clear glass and some compatible stringers. You'll also need a glass fusing kiln, some kiln wash for your shelf, some pliers or mosaic nippers to cut the stringers and a glass cutter to cut the sheet glass if you're making a different size or shape. You can use a square or a circle as your base shape. A circle will give you a more “wavy” edge, while a square will give you more of a handkerchief drape shape with points. SAFETY NOTE: Always wear protective glasses and closed toed shoes when cutting glass. (Note this pic shows a chutney dish not a cocktail shaker!) Option A – Simple vase:
Option B – Crisscross vase:
Option C - Bare Stringer Vase
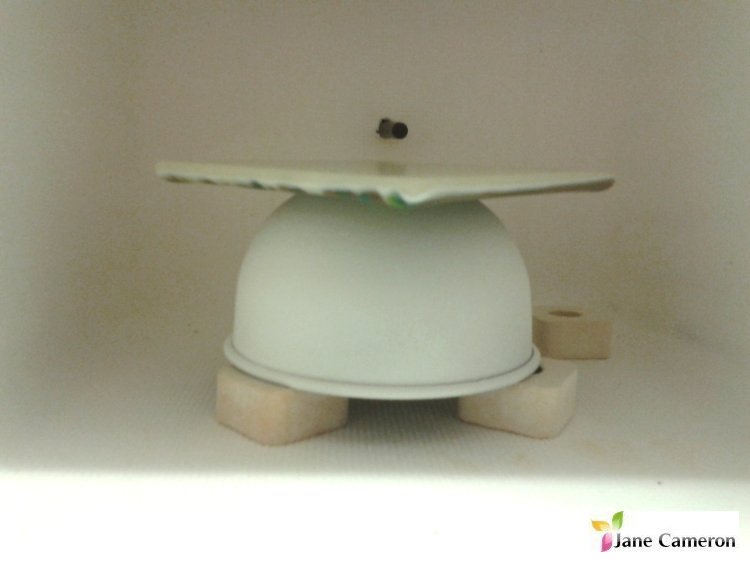
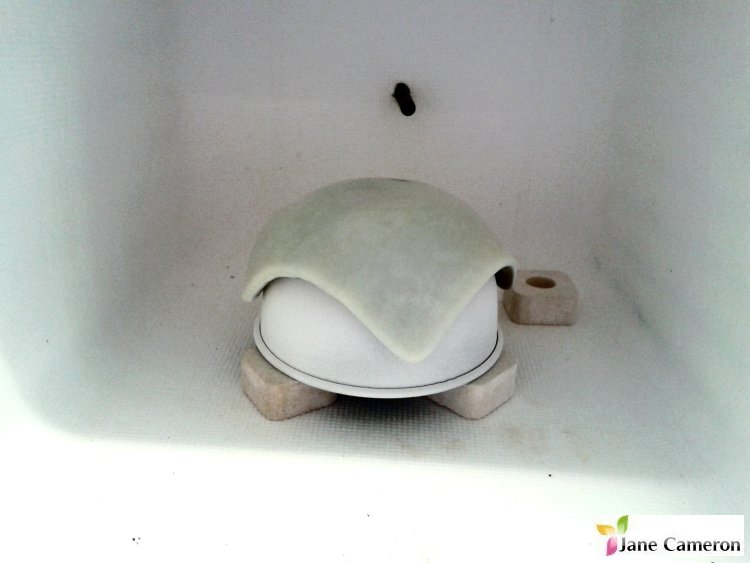
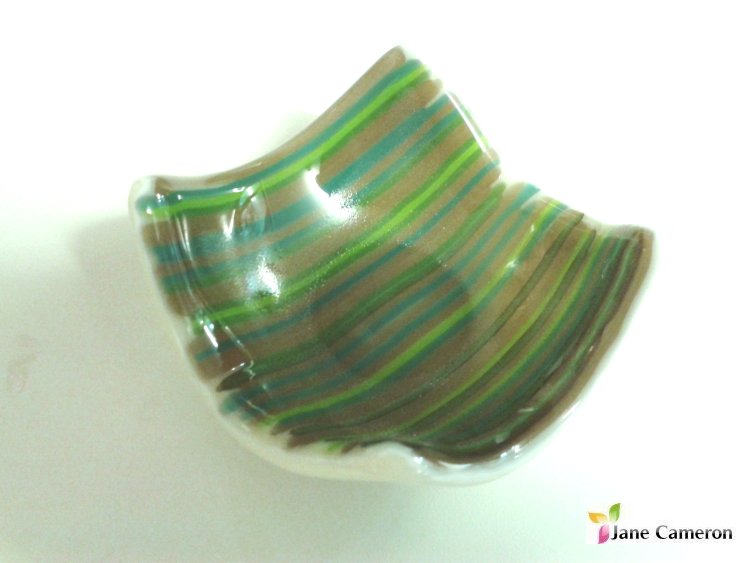
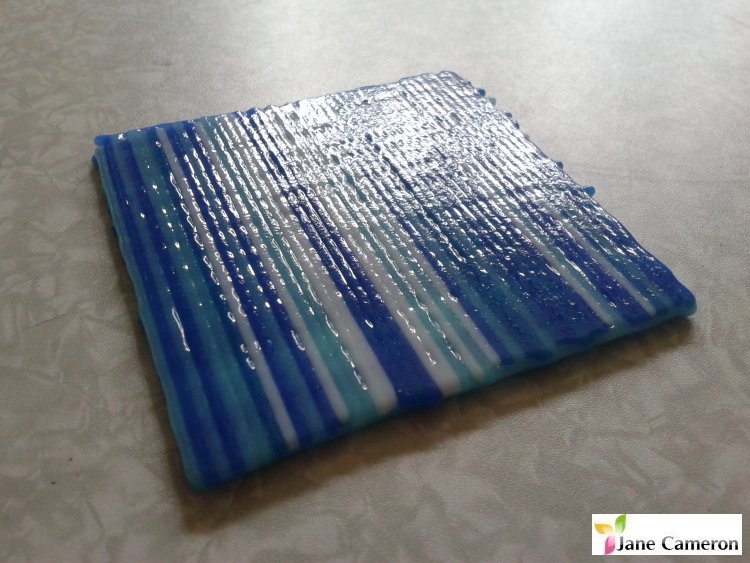
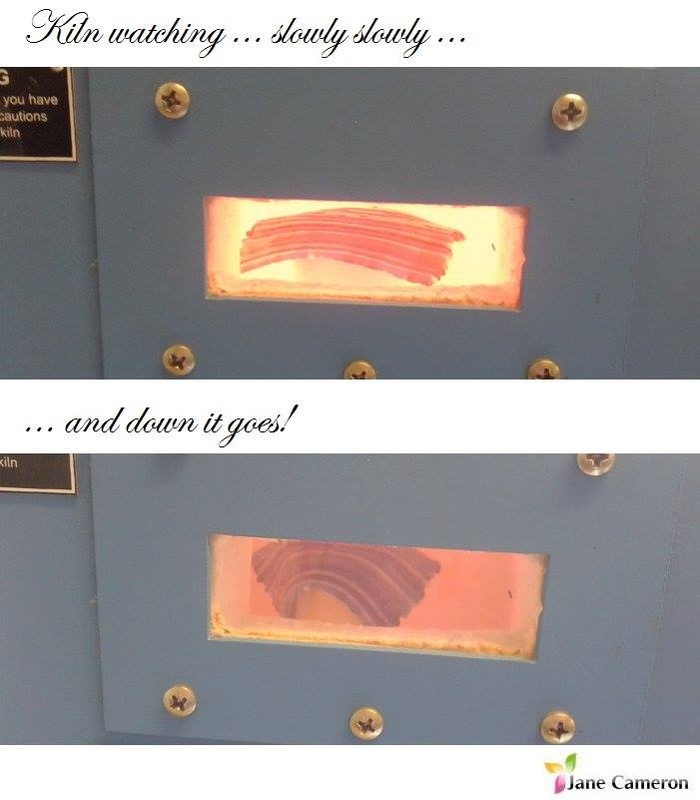
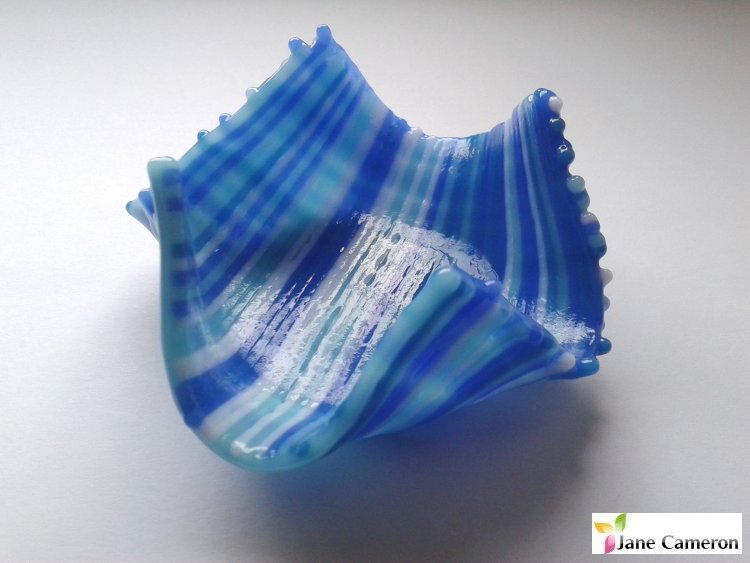
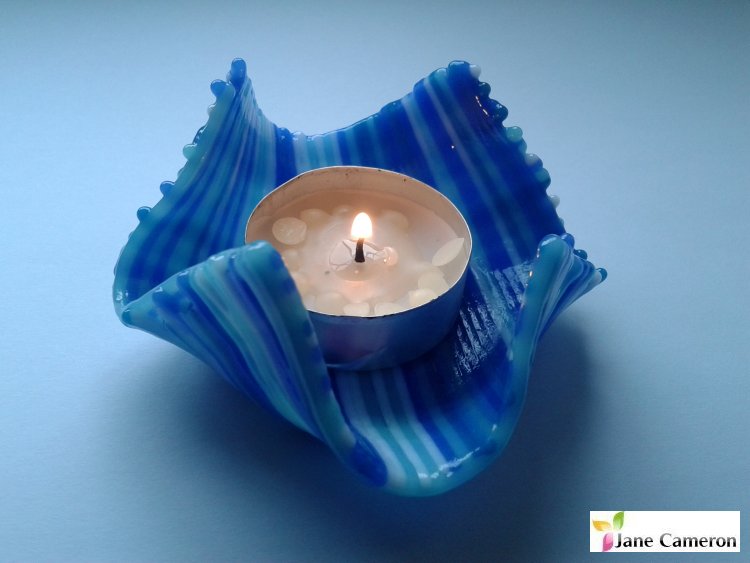
You can obviously use coloured glass instead of clear, if you'd like. You can use glasstac or other suitable fusing glue to hold the stringers in place so they don't roll about. Then full fuse (use the firing cycle appropriate for the glass you are using) to get a nice glossy stripy thing or tack fuse to keep the texture. This will give you a square or round stripy flat plate. After this, kilnwash or MR97 your cocktail shaker, put upside down in the kiln, put your square (or circle) on top and slump. Some people put a layer of thinfire paper on too, between the metal and the glass, to make doubly sure it won't stick. As the kiln heats up, the vase will droop down and form lazy ripples around the shaker. Don't let it go too far down cos if you overslump it then it can hug the shaker too tightly. Once it's draped enough, forward your kiln programme on to the "annealing" segment. SAFETY NOTE: Always wear appropriate glasses and heat protection (proper gloves and clothes made from natural fibres!) when peeking in your kiln - you can get special infrared filter glasses which stop the glow from damaging your eyes. Remember not to get too close - I'm sure you like your eyebrows! You can also do these drape vases in tealight size using those little chutney dishes they use in curry restaurants! I sometimes prop those up on a kiln post or something so that the edges can flop down past the edge of the dish. It's a good idea to only do one of these in your kiln at a time, because different colours of glass melt at different speeds. I'll update this post with progress pics later! As you can see, although of relatively simple construction, these vases and bowls do require a certain amount of attention and take at least two days to make and shape. Have fun! :) UPDATE 11th June 2016: Wow! I had no idea that this free tutorial would be so popular! Thank you so much to everyone who commented. I look forward to seeing what you create! As requested by loads of you on Facebook, I have made a couple of tealight size samples to give you an idea of the finished product. This green one is one layer of glass with stringers on top, full fused: This blue one is two layers of stringers, tack fused: I hope that these pictures give you a better idea of what to expect when making items like this, not only how different layups look but also how the shape of your mould can affect the finished item. You can of course make bigger ones, but I decided I wanted to make little ones :).
Happy fusing!
1 Comment
Rebecca Weber
8/6/2016 22:29:01
I've been playing with stringers and tapestry pieces, and have been trying to find something new to do with stringers. This looks like fun. I'll let you know how it turns out! Leave a Reply. |
Jane Cameron
Experienced silk painter, glass fuser, teacher, enthusiastic and inspirational. Archives
June 2019
Categories |


 RSS Feed
