
|
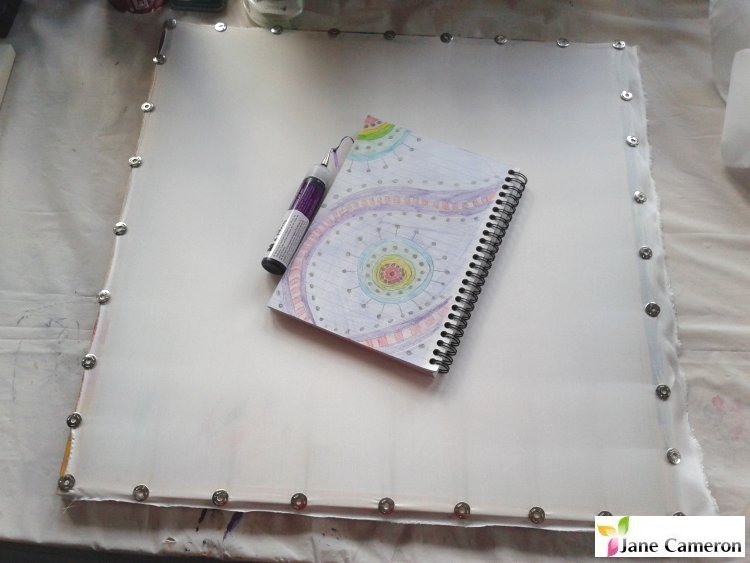
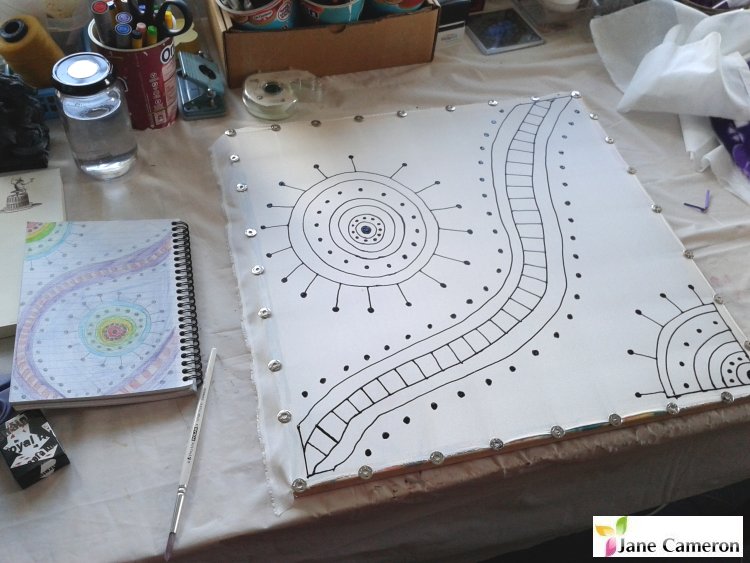
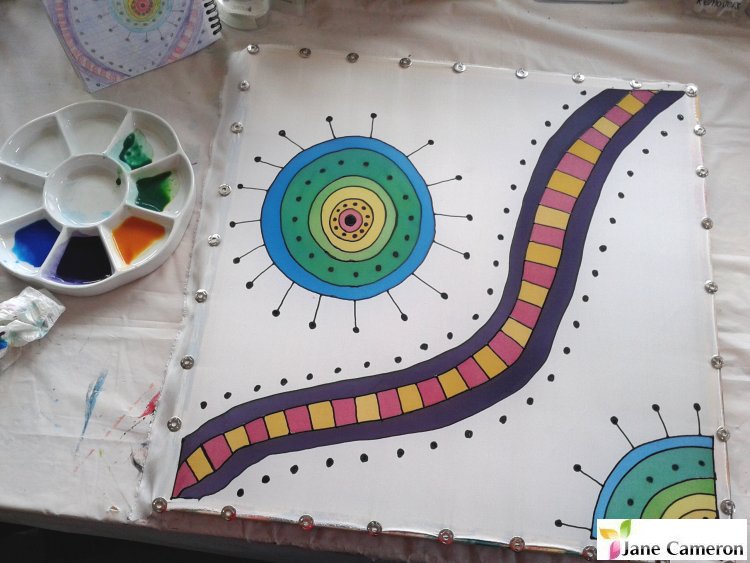
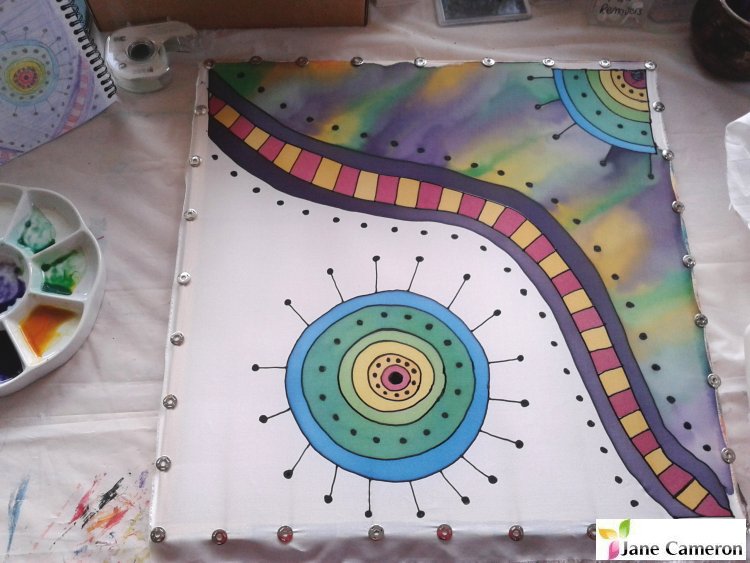
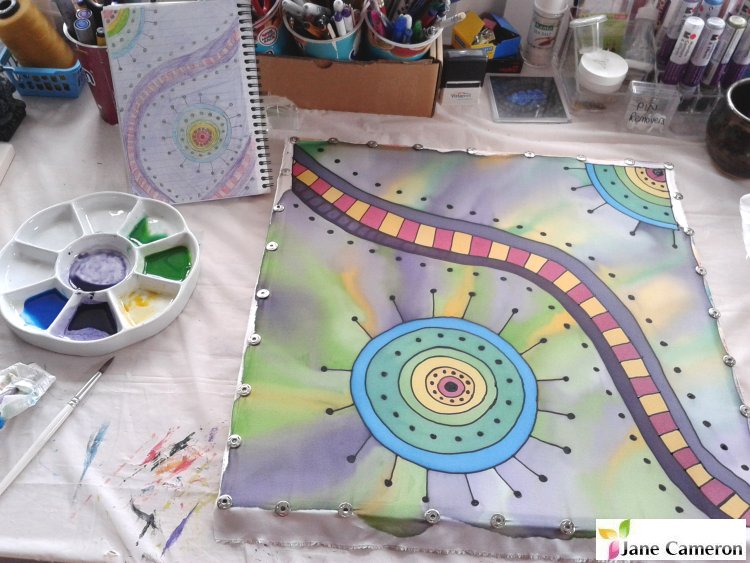
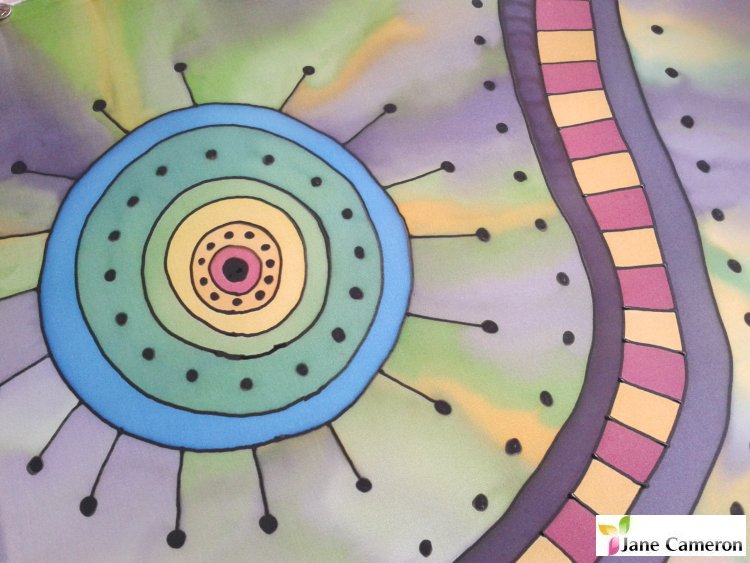
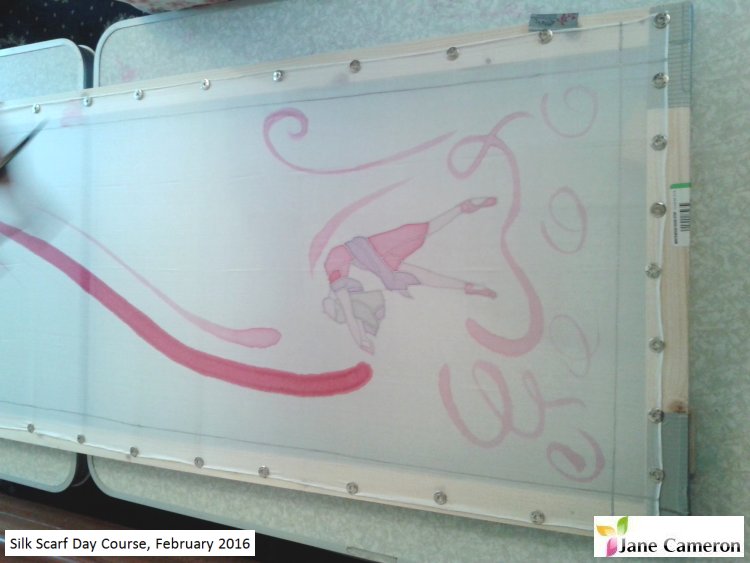
Having spent the morning tidying my workroom, I thought it was time to have a bit of fun and do myself a silk painting ... I based this on a design I drew when I was on holiday last year - hurrah for sitting by the pool with colouring pencils - and I'm quite pleased with how it came out. I actually remembered to take some progress pictures, so here they are: I only used three colours (red, yellow and blue) for this painting and mixed them to make the other colours I wanted. I diluted them down with water to make the blurry background, which helped the main shapes to stand out.
This was fun to paint, and I think I'll be doing some more pieces like this. I might turn into a cushion cover, or frame it. Next time I might try a similar design on a scarf ... I think it could look really good! If you'd like to try your hand at silk painting, pop over and book yourself a place on my Silk Painting for Beginners Course. The next date is 21st May in Woking. You can join my mailing list (or send a message through my contact page) to find out as soon as new dates come online. See you soon! Happy Painting :)
2 Comments
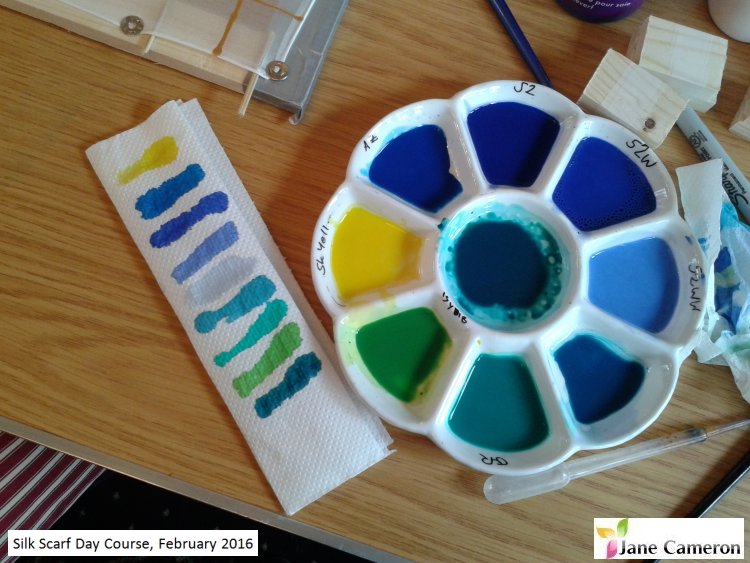
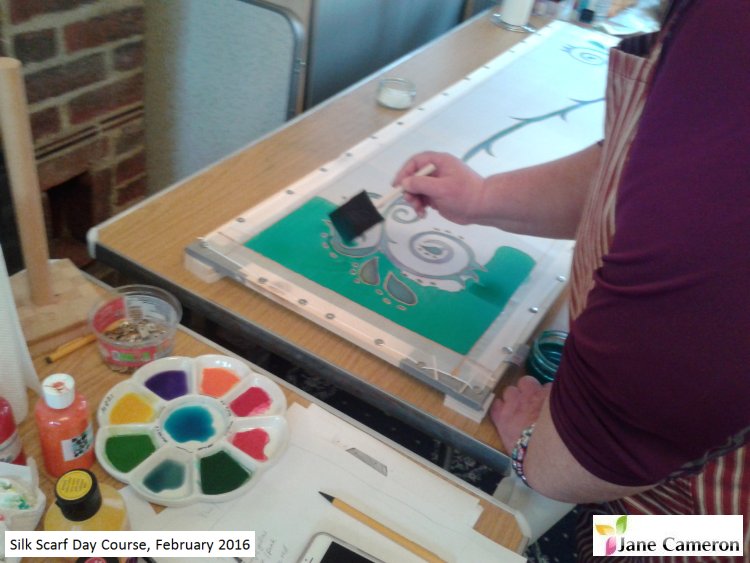
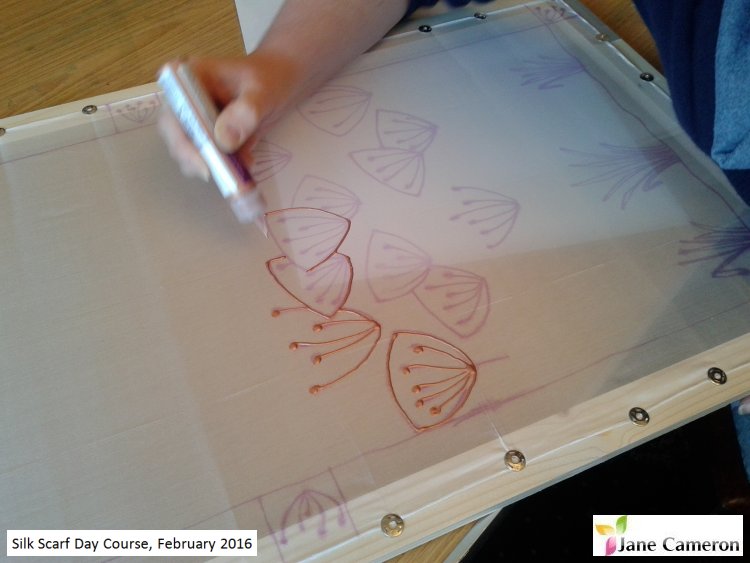
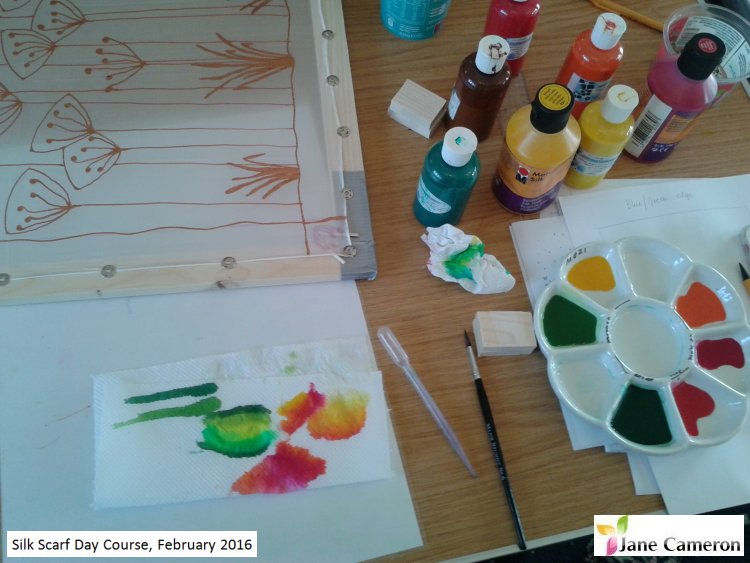
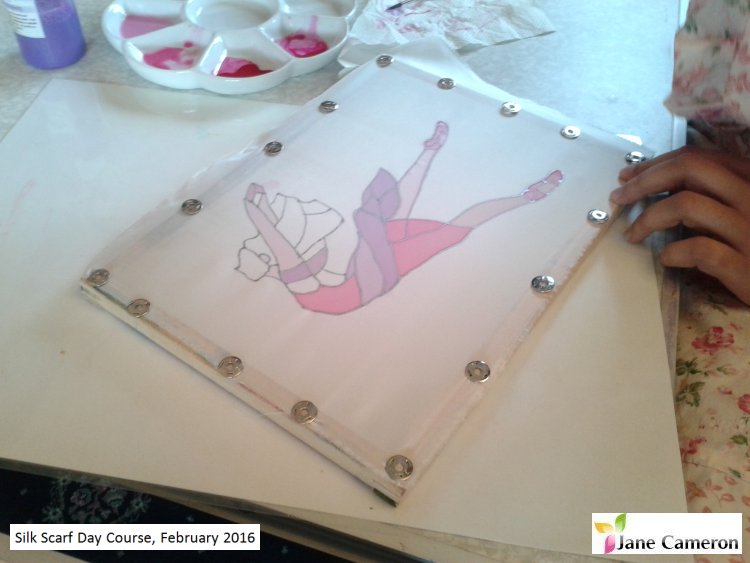
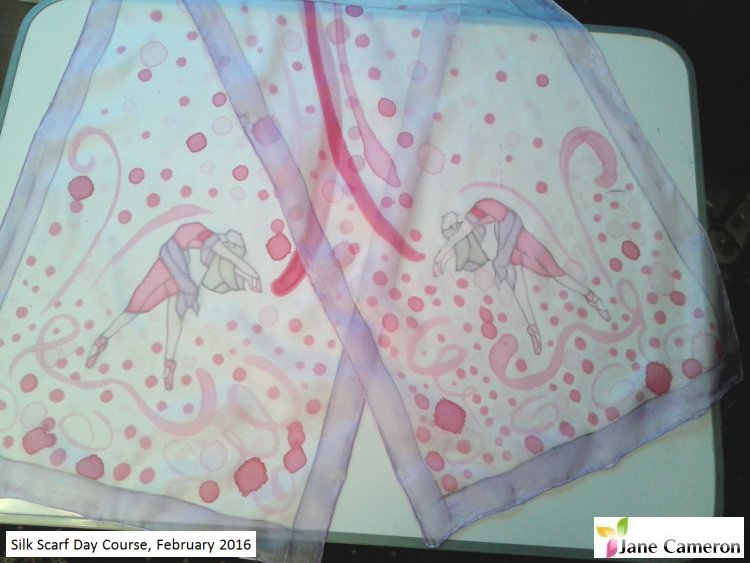
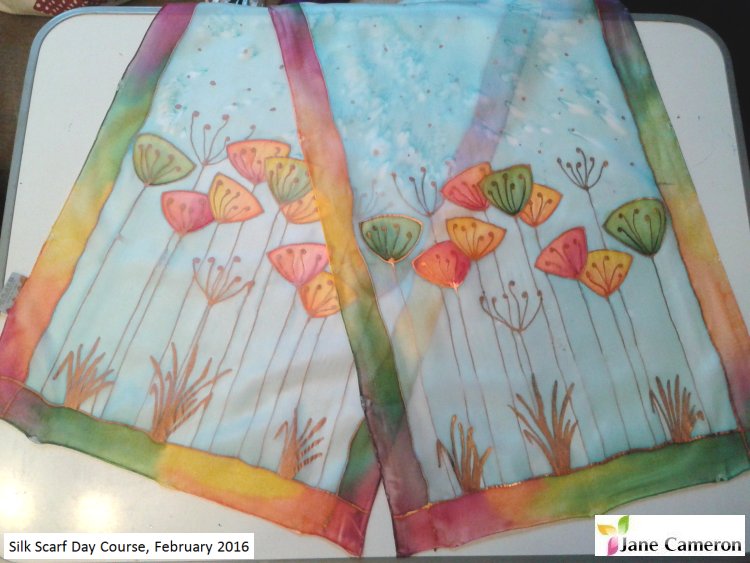
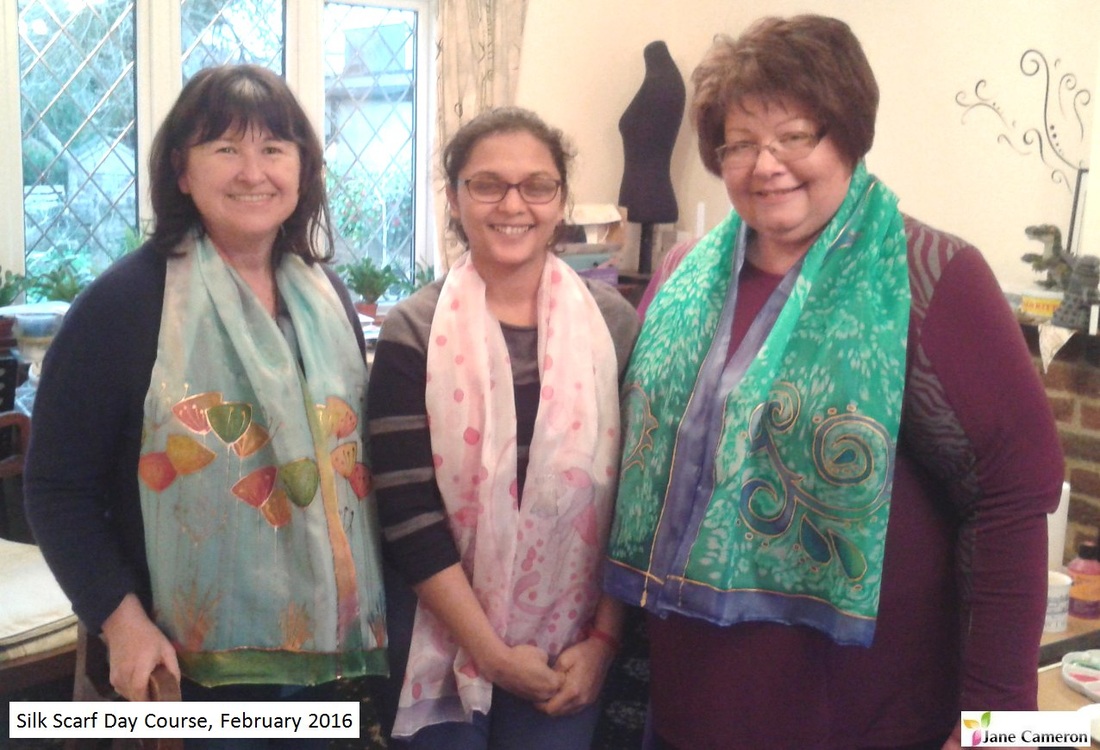
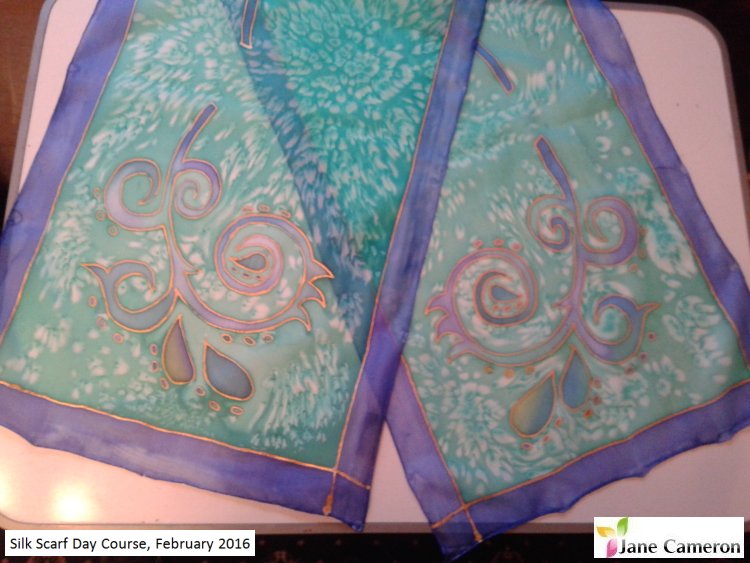
I was very pleased to be able to run my new "Silk Scarf in a Day" course this month for a group of three lovely ladies at my home studio. We had a fabulous time and I was really proud of the beautiful pieces they created.  Each of these ladies had previously attended my "Silk Painting for Beginners" day course, so had some silk painting experience. We started off by looking at the ideas and inspiration they had brought with them, and how that could translate into a good scarf design. We put the silk scarf on the frame and then worked on paper to tailor our design to the size of the scarf. After that it was time to transfer the pattern, outline, and paint! Here are a few photos from the day: I'll be running this exciting course again in the next few months. Join my mailing list to be one of the first to know when I put the dates up for booking.
Feedback:
See you soon! You can also find out more and see my latest work on Facebook. So, you hate your day job and are wondering about whether you could make a nice income from your art or craft so you could hand in your notice and just create all day?
Sounds nice, doesn't it. However, will it be so good when your studio is below freezing, your fingers are so cold that even a cup of tea and thermals aren't defrosting you, and you've got 20 of those things to make and sell by the end of the month just so you can put dinner on the table? It's not just sitting and making pretty things while thinking happy fluffy arty thoughts, you also have to be able to do marketing, business planning, project management, photography, selling, administration, accountancy, self discipline and motivation ... the list goes on! You need to build up savings to cover holidays and time off sick, and you have to sort out your own tax and pension. You need to have enough room to create and to store your creations, which may mean hiring studio or storage space. Even if you are just looking at "selling a few things I have made to get some spending money for my next holiday", or "my friend wants to pay me to make her some cushions", or "it's just one christmas fair as the PTA wanted to bump up the numbers", you are still selling, so you need to register as self employed, which means filling in a tax return. You also need insurance. If you've read all this and it still excites you, then go for it! Even if you're just doing one fair, please price your work fairly. Please take into account the time it took you to design, make, photograph and package it, and pay yourself a decent living wage on top of the cost of the materials. There's nothing to stop you doing special deals for your friends, but do let them know it's a special deal otherwise all their friends will want one at that price too! There are lots of resources out there to help you if you do want to start your own business. Here's a few of the ones I've found the most useful: Tax
Insurance
Business Resources
Storage and Studios
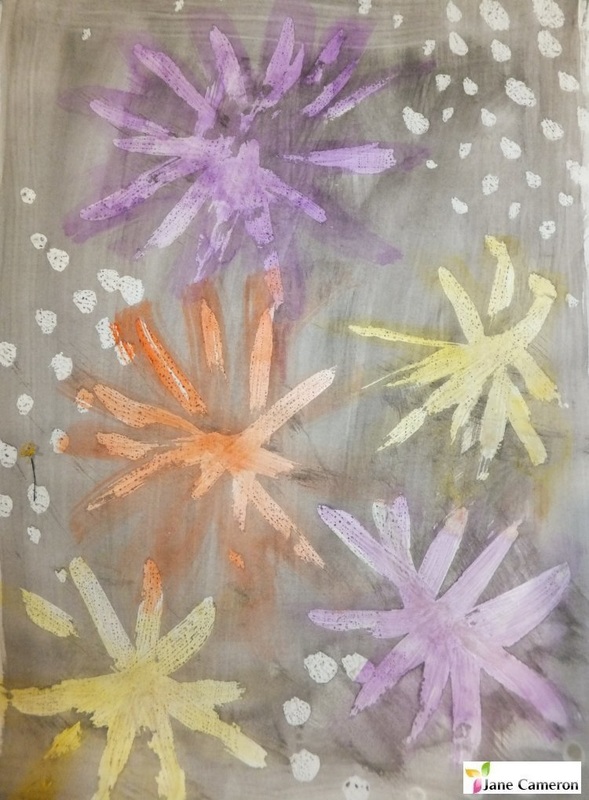
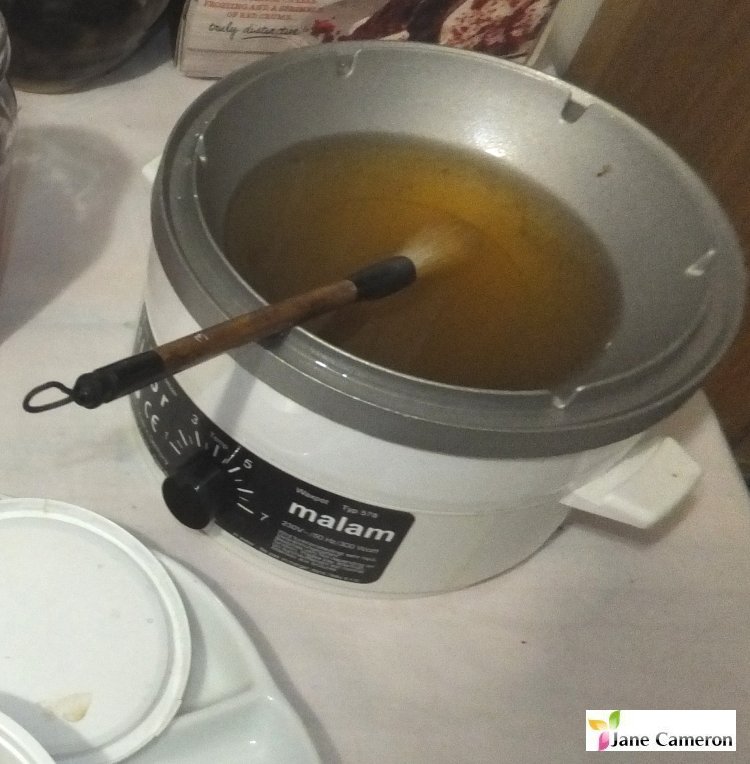
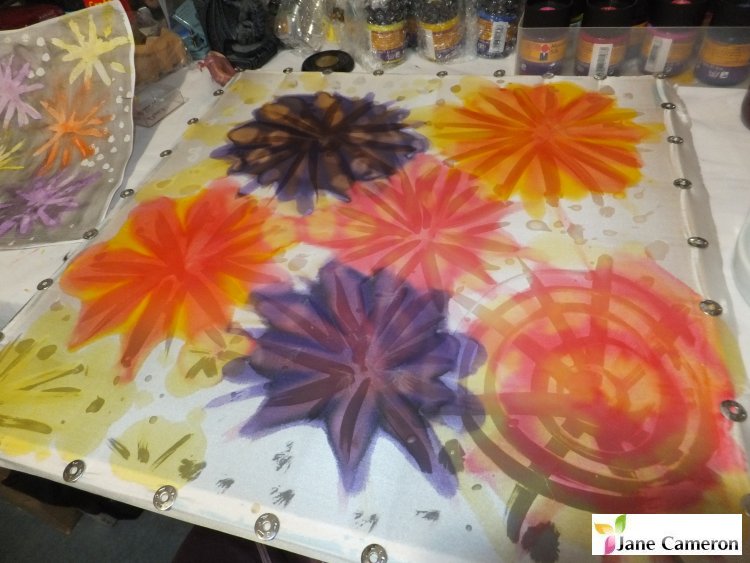
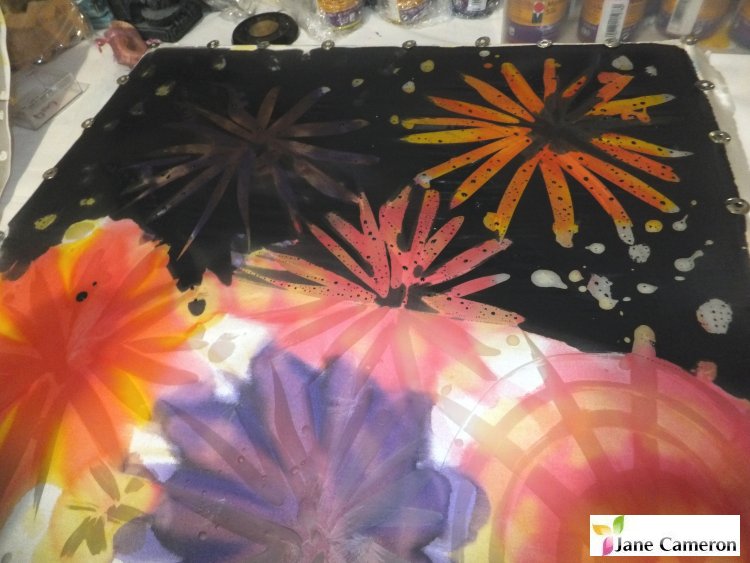
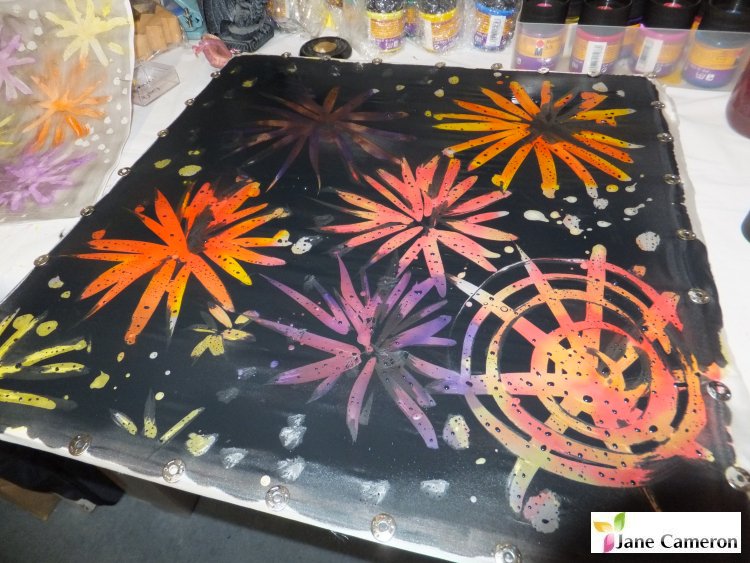
You may be one of the lucky people who has decided to take the plunge and get into glass fusing. Well done! You're in for a fabulous, exciting (and expensive!) ride down the fusing slope. How can I melt stuff? Where do I start? Several places sell "microwave kiln kits" which can be a good place to start if you're on a limited budget and want to make jewellery. The kits are likely to contain sheet glass, firing paper (stops the glass sticking to your kiln), gloves (essential), safety glasses (essential), a glass cutter, and other exciting things to make your life easier and your work prettier. It is a really good idea to have a dedicated microwave for your kiln, and you can often pick these up secondhand locally. One with a digital readout that you can program in minutes AND seconds is really helpful, or just use a stopwatch! A word about safety: When you are handling or opening your kiln, ALWAYS wear your safety glasses and your gloves. It's also a good idea to wear natural fabrics, as artificial fibres (nylon / polyester etc.) will melt and stick to your skin if they get too hot. Get prepared before you start firing - always make sure that you have somewhere to put your kiln when you take it out of the microwave (an old marble or granite tile from a kitchen supply shop is perfect!) (An example of a microwave kiln starter kit) 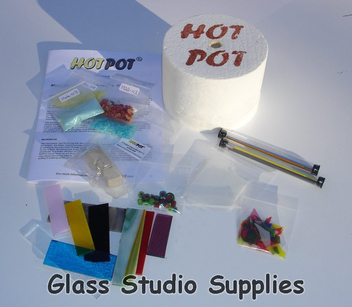 Types of Glass ... Bullseye / Spectrum / Float / Bottles ... argh! You can use any of these types of glass, but NEVER mix them together. Different types have different COE (coefficient of expansion) which means that they expand and contract differently when you heat them up. This means that if you mix them they will shrink differently when they cool down and crack your creation. Even the tiniest bit of cross-contamination can ruin a piece, so do practice good glass hygiene! Spectrum is the softest (COE96), then Bullseye (COE90), then Float (window glass) and Bottle glass are the hardest. Harder glass takes longer to melt. You can get loads of pretty bits (frit / confetti / millefiori) to make fabulous things, but bear in mind that these are also made from glass so you can only use them with the same COE of sheet glass. The COE of Float and Bottle glass varies a lot, so only use pieces from the same sheet or bottle together, don't mix them. Cleaning your Kiln: When you are cleaning your kiln (removing the old firing paper), ALWAYS wear your dust mask and work in a well ventilated area. The ceramic fibres are really teeny and it's not good for you to breathe them in. Don't put old firing paper down the sink. It will clog it up. Instead, tip the old firing paper (which turns into powder during the firing) into a pot of water - it will sink to the bottom and then you can tip off the water and put the sludge in the bin. You can use a soft brush to make sure your kiln is clean. The best way I've found to do this is to get a small bucket and a big resealable bag. Put the resealable bag in the bucket and fill the bag about half full with water. Then you can use it to hold your old kiln sludge, and when it starts getting full you just tip off the clear water, seal up the bag and put it in your general waste bin. Repairing your kiln: If the inside of your kiln gets chipped or damaged, talk to your local glass supplier (list at bottom of page) for safe ways to repair it. It is possible. Limitations: Microwave kilns are cute and a great place to start, but you'll have trouble doing things much over pendant size if you want them to stay in one piece long-term, as the temperature you need to anneal your glass at is very specific and can only really be achieved by using a kiln with a digital controller. The best way to start to understand how things will come out of your kiln is to write down what wattage you used, for how long (minutes AND seconds!), what glass was in it, how big it was and how many layers, and take pictures of before and after and stick them in a notebook. Oh, and microwave kilns really don't heat evenly ... I tried doing a slump (bending the glass into a ceramic mould to make a little dish) in mine and it didn't work at all ... part of it went down and the rest stayed sticking straight out!!! You can "calibrate" your kiln by spreading little 1cm squares all over the firing surface and seeing how different they are when they come out. The golden rule is once you have finished firing and put the kiln to the side (on a heat resistant surface) to cool down, DO NOT PEEK AT ALL for at least two hours, and preferably leave it overnight. This will allow it to cool gently and make your pretty things less susceptible to thermal shock. There are loads of helpful videos on Youtube. Your next kiln: When you look at moving up, I'd recommend the Paragon SC2 as a first "proper" kiln - It's friendly, has a digital controller and takes up less counter space than your second microwave! You can make things like coasters, suncatchers, small dishes and jewellery in it. I have one and, even though I have now upgraded to a larger kiln, I still use it a lot for making samples and small things. If you're not sure what to get, have a chat to your local friendly fused glass supplier. I've put a little list here to get you started: (UK Suppliers: Glass Studio Supplies, Warm Glass, Creative Glass Guild, Reading Stained Glass, Tempsford Stained Glass, Creative Glass Shop, among others.) Good luck! Always remember YMMV (Your Microwave May Vary!) Disclaimer: You are responsible for your own safety. Read carefully and follow the instructions which come with your kiln. Always wear your safety glasses and gloves when working with hot glass. I had a great time tonight painting fireworks on silk, so thought I'd do a very brief run-down of how I did it, in case you want to paint some too!
So, in the following photos you will see I have:
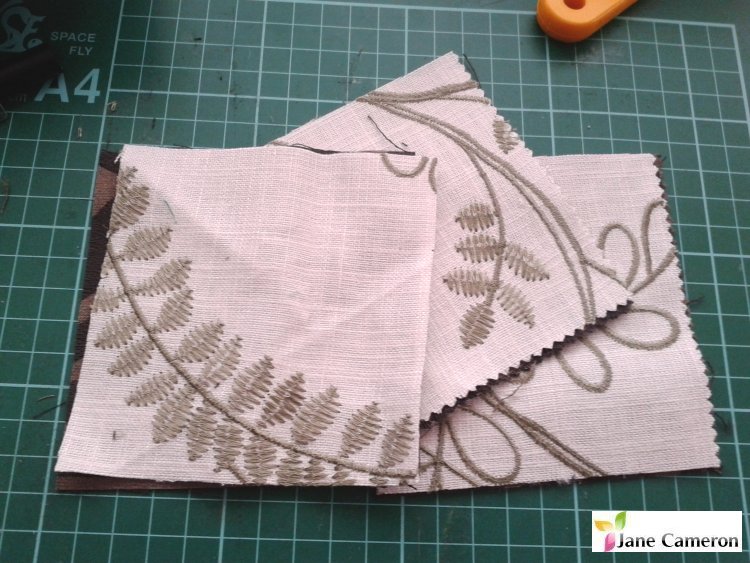
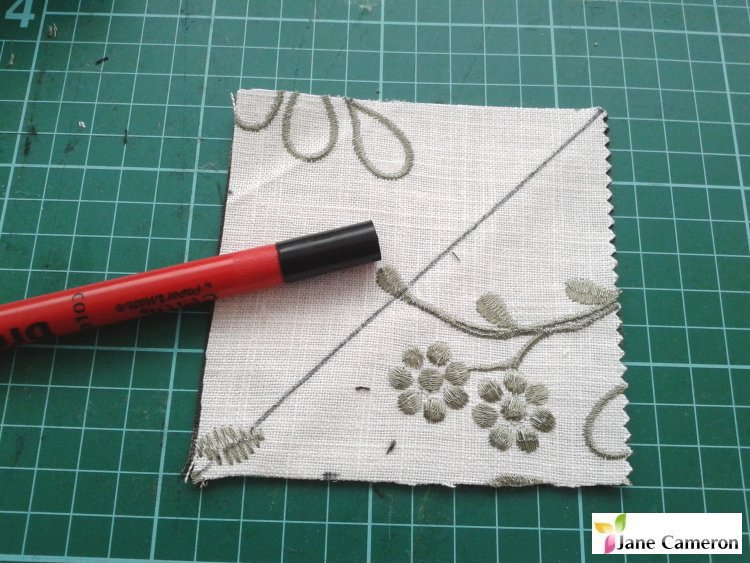
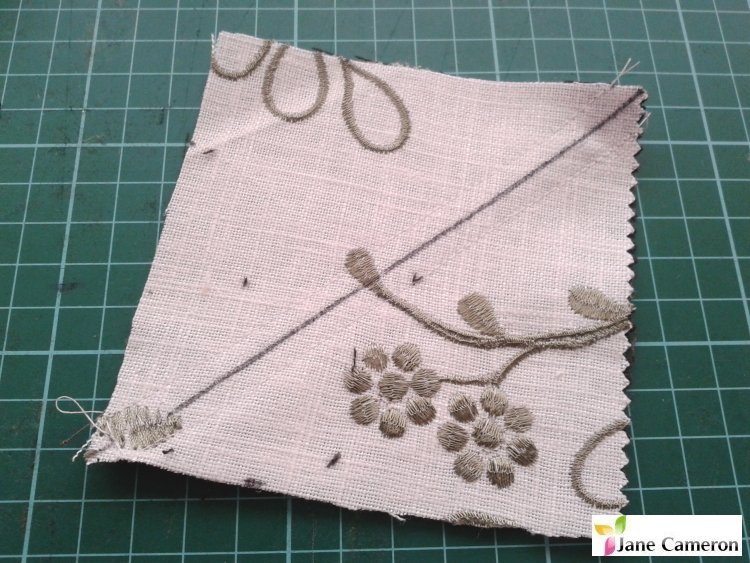
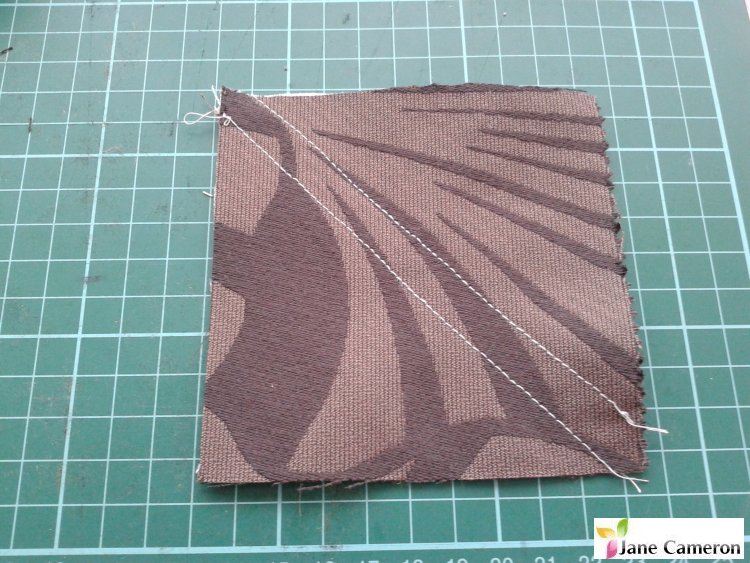
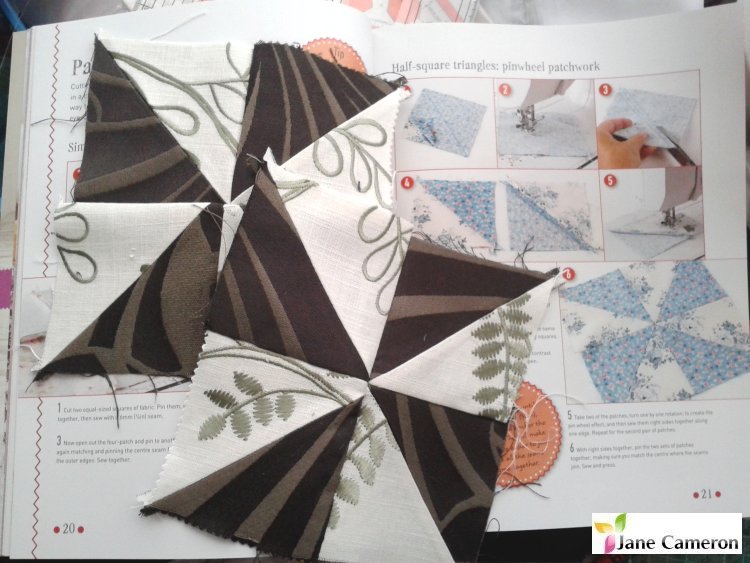
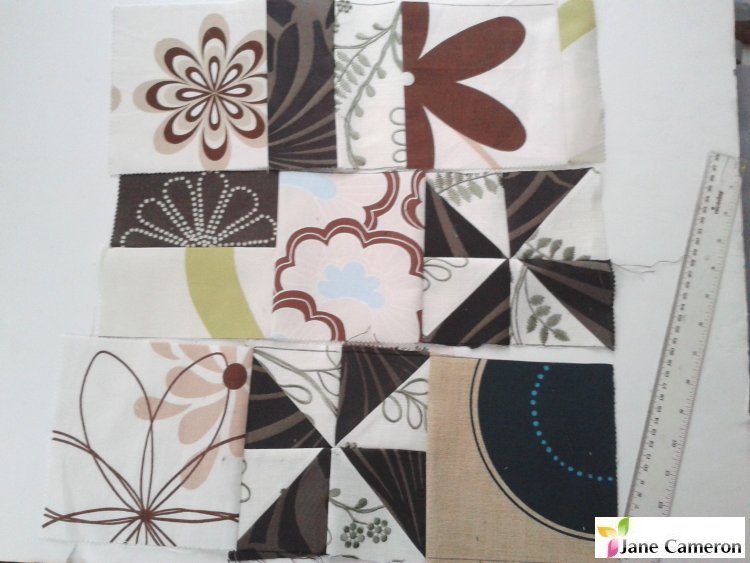
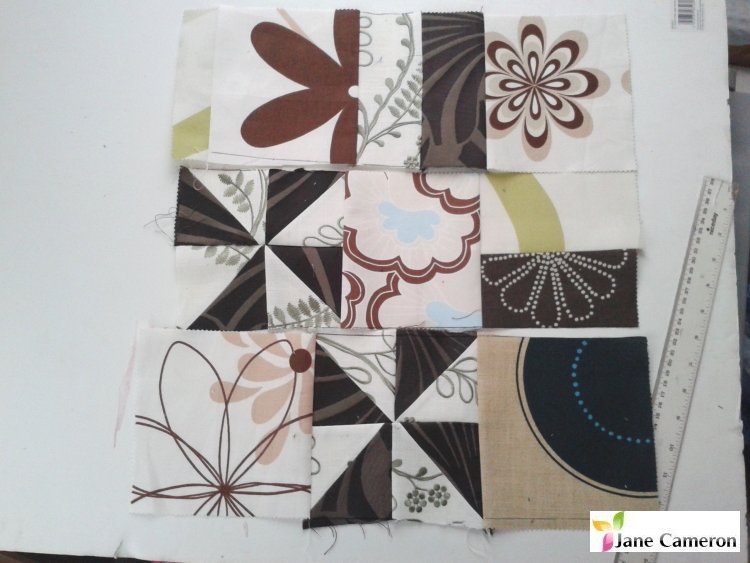
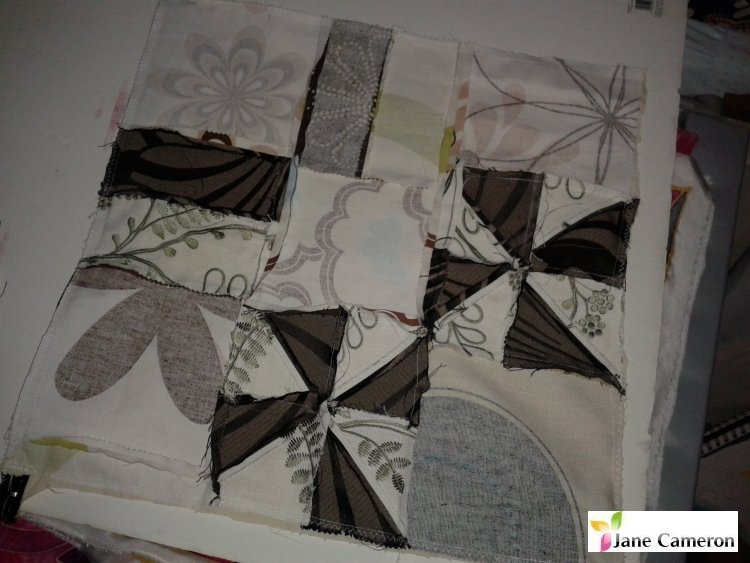
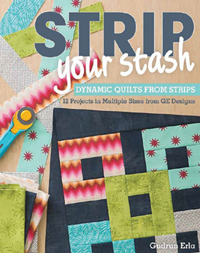
Once it had dried enough, there was one further very important step - if you don't want to have polkadotted fireworks, you need to remove the excess paint from on top of the wax. I do this with the corner of a damp kitchen towel. If you don't do this, when you iron your wax out, the paint will go through to the silk and cover it in little black dots.  The last step in the process will be to iron my piece between layers of old newspaper to remove most of the wax, then wash my piece in "wax out" or shake it in a jar of white spirit (or get it dry cleaned) to remove the residual wax. After this has been done, my piece will be all nice and soft again, and will be able to be handwashed as normal. The colours will also be brighter as the wax will have been removed. I hope this is helpful - happy creating! Jane :) Do leave me a comment here, or pop over and say hello on Facebook! 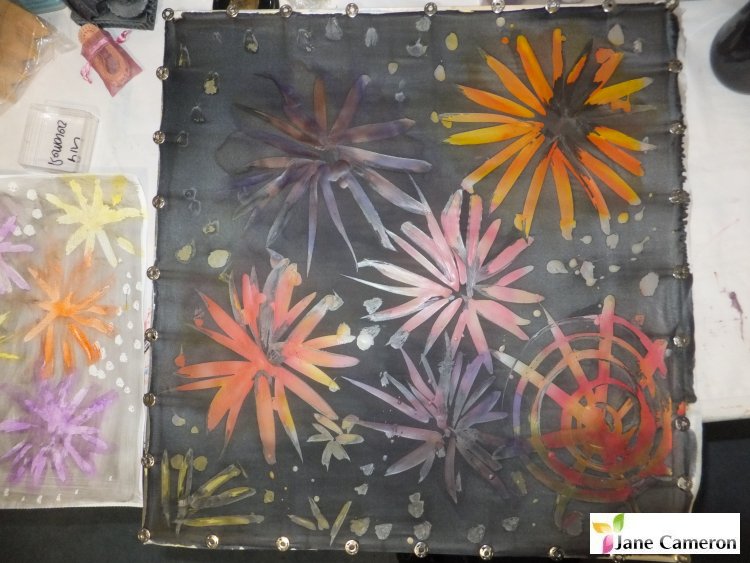 The Book: 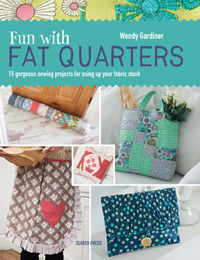 "Containing 15 fresh, fun fat-quarter projects, from doorstops and drawstring bags to tablemats, aprons and cushions, this book is ideal for sewers of all abilities. It starts with a comprehensive techniques section, guiding you through a variety of useful techniques, from inserting a zip and sewing buttonholes to creating patchwork. The techniques are fully explained and are combined with easy-to-follow step-by-step photography. The book then leads on to the projects; each contains inspiring photography, instructive hand-drawn illustrations and heaps of handy hints and tips. Each project is made from fat quarter fabric, but there is no reason why you can’t cut your own or use up some of your cherished left-over stash fabrics instead." My Review: Search Press Book Review – Fun with Fat Quarters by Wendy Gardiner “15 gorgeous sewing projects for using up your fabric stash” As you can see from the cover, this is a book of projects for using up those lovely little pieces of fabric you have bought or accumulated over the years, but which don’t quite go with the rest of your stash. It’s a new book from Search Press, which came out earlier this year. The book is well presented and has nice clear pictures – a mixture of photographs and sketches. The book is aimed at beginners, starting off with “What is a fat quarter?” and going on from there to materials, tools and techniques. I decided to have a go at making a pinwheel block, as I’d always been scared of having to sew the triangles together (don’t ask!) but this way is really easy! The projects start at Page 41, but a lot of them didn't really inspire me - things like the apron could be resized to fit a range of people, and the draught excluder would be great as a child's first sewing machine project as it's just straight lines (though they may need a bit of help with the "box ends"). There are some lovely cute projects, such as the drawstring shoe bag and lingerie bag with applique high heels and underwear! I liked the description of the party clutch and the “Bubble” technique, which I’d only seen previously using shrink polyester. The “Tucked and stitched pillow” looked like a great opportunity to try out all those fancy stitches on your sewing machine, and the tucked bit suddenly looks easier than I thought it would be! What I made: I had some sample pieces of upholstery fabric I’d collected over the years, so thought this would be a good opportunity to use them up by trying to make pinwheel blocks. I actually got out my iron this time! It’s amazing how much easier it makes things … (Yeah, who knew!)
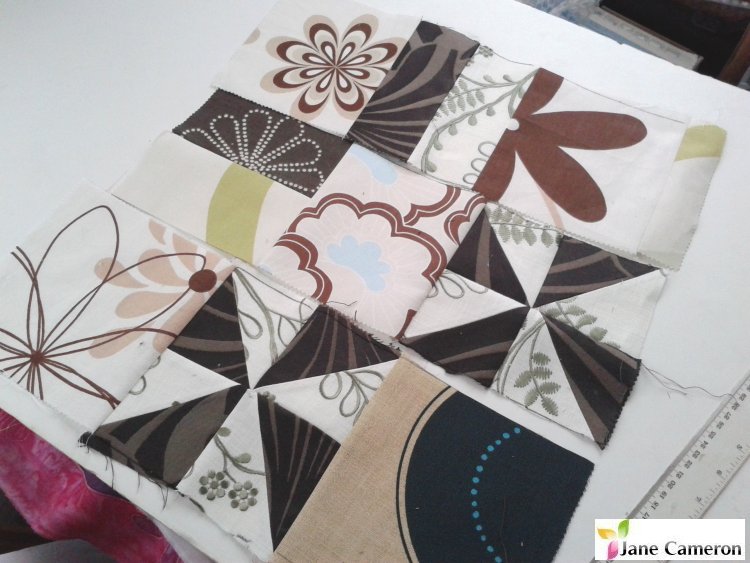
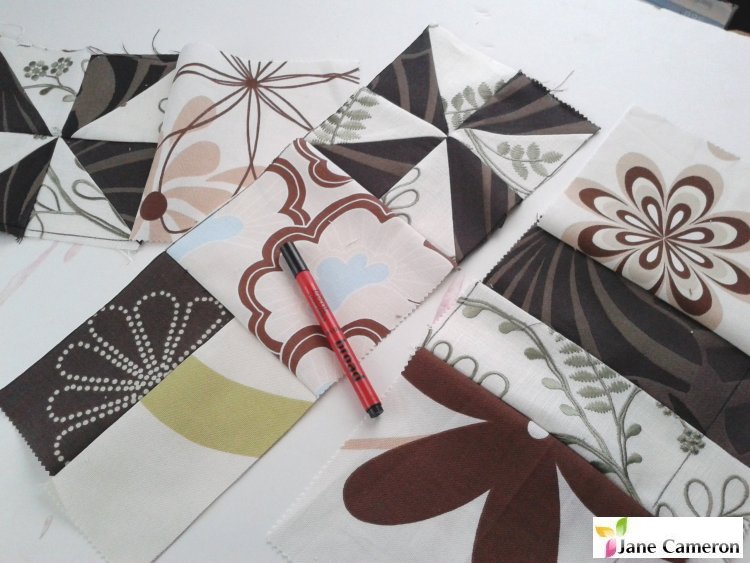
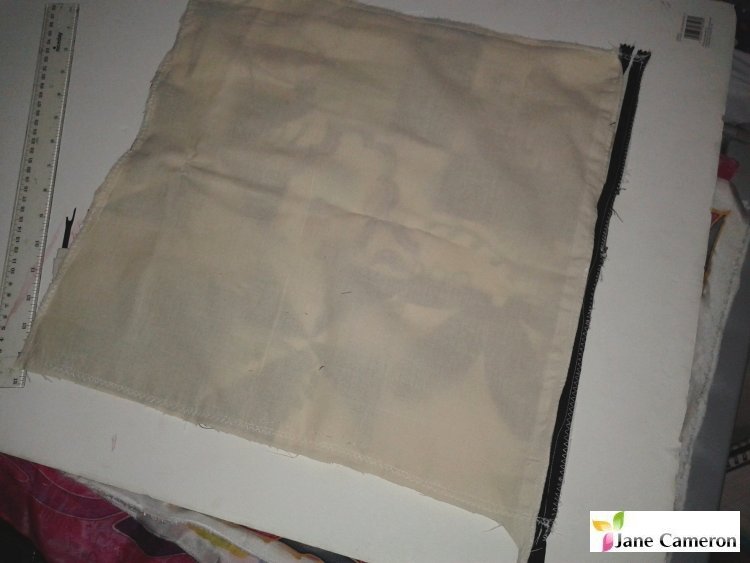
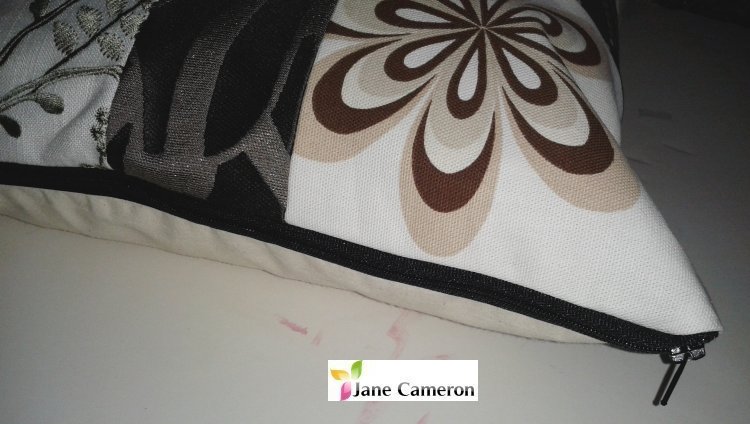
So I followed the nice clear instructions, and although my blocks aren’t perfect they’re not too bad, especially as upholstery fabric is quite thick and there’s a lot of fabric where all the corners meet. Once I’d made a couple of blocks I wondered what I should do with them … once I laid out all my pieces of fabric I realised I had enough to make a cushion, and I even had a zip. I tried various layouts … I sewed the pieces together in strips, evened them up and sewed them all together to make a square. I found some plain calico in my material box which I used for the backing, and I actually got the zip right this time – no visible stitches on the outside – I’m really proud of it! So here is the finished cushion, which I love and will be staying in my lounge. 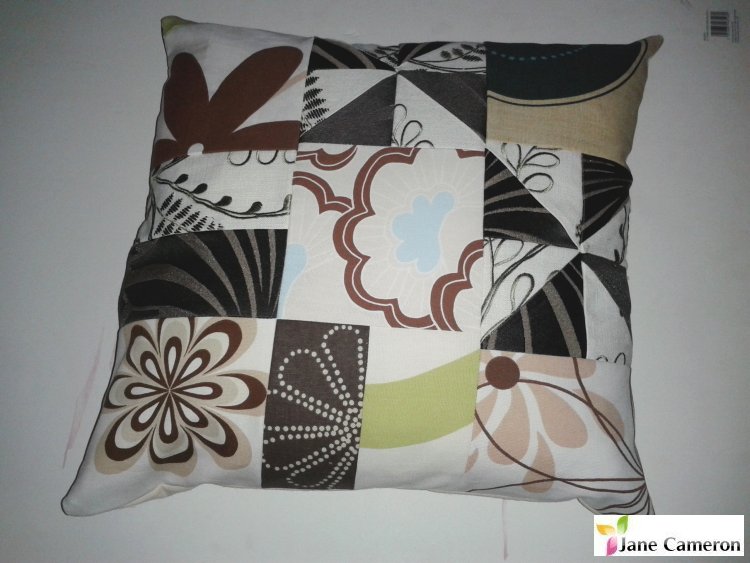 Thanks so much to my lovely colleagues at Search Press for my review copy of this book.
You can buy your copy here for just £10.99: http://www.searchpress.com/book/9781782211464/fun-with-fat-quarters In case you’re wondering why I am working on my patchwork skills and not my silk painting at the moment, my long term plan is to make cushions out of my hand painted silk fabrics. Watch this space and sign up to my mailing list to be the first to know! In other news … Spring 2016 silk painting course dates coming soon ... I have set up a new group for silk painters in the UK. Everyone who has tried silk painting is welcome to join us - we've got a mix of new and experienced painters so it should be great fun. We can get together in a friendly environment and chat about stuff / share hints and tips etc. Here it is! https://www.facebook.com/groups/1640085952923187/ You can also find me on my Facebook page :) Happy creating! Search Press Book Review - Strip Your Stash – Dynamic Quilts made from Strips - Gudrun Erla25/10/2015 About this book
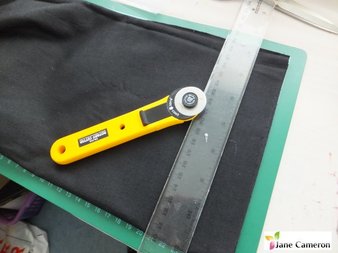
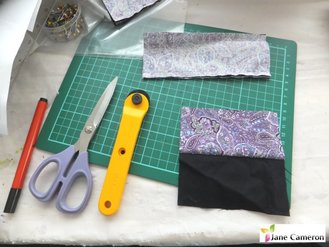
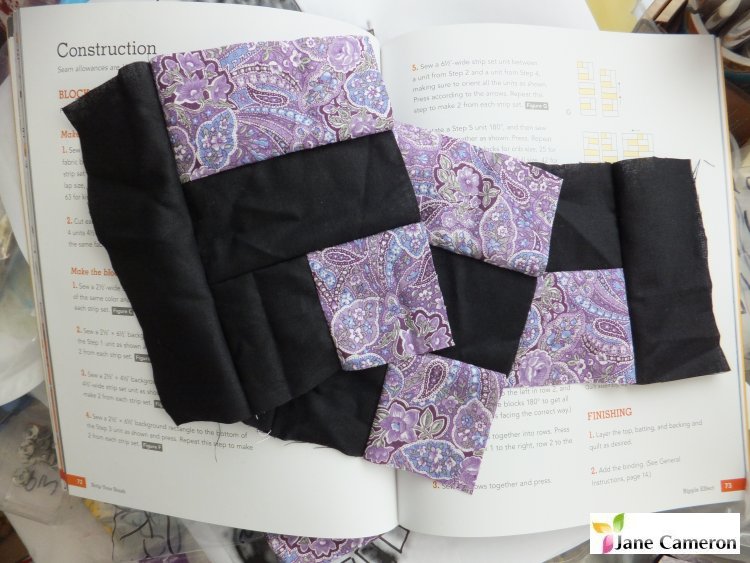
My reviewI’m not a patchworker but I love this book! It makes me think that I could be one! The instructions are fantastic, so clear, with lots of pictures and diagrams, and tables to show you exactly how many blocks and how much fabric you need for each type of quilt. So, I decided to have a go at the Ripple quilt. A small one. I chose this one because it was all straight lines and no diagonals so I thought I’d have a chance of getting it right! It starts off with an insight into how to collect, prepare and store your strips, which would be really helpful for someone with a larger stash, and suggests steam ironing them before use to reduce the chance of shrinkage. The book then talks about each quilt design and gives some ideas for how to select fabrics to make them look effective. It also has some pages of general instructions, including some great pictures on how to bind a quilt using straight-grain binding. Each section of the book is a complete project. This makes it easy to concentrate and not get lost! It also tells you the size of your finished block, which in the “Ripple Effect” version is 12ins x 16ins. I knew I didn’t need a full size quilt, so wondered whether I should just make a couple of blocks and turn them into cushions or bags … Or whether to make a long thin one to go across the end of the bed … which would also mean it would fit in the sewing machine! Decisions! Time for a look through the fabric stash! Unfortunately, unlike Gudrun, I don’t have a nice pre-cut set of strips anywhere so I have to choose my fabrics and then play with the rotary cutter and mat … time to go and make them earn their keep!
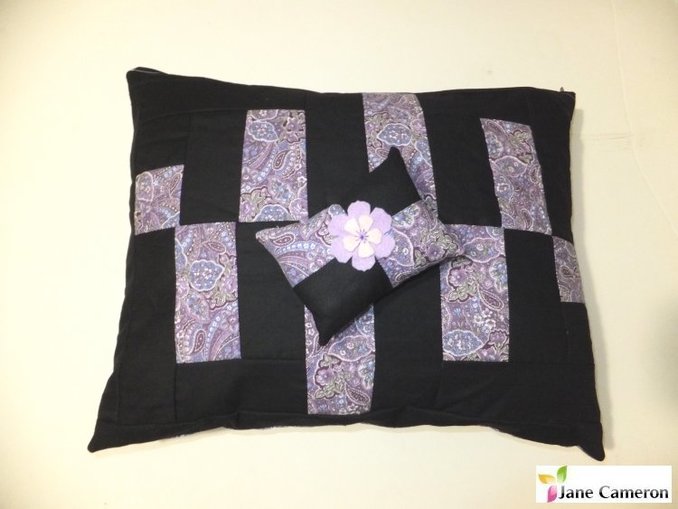
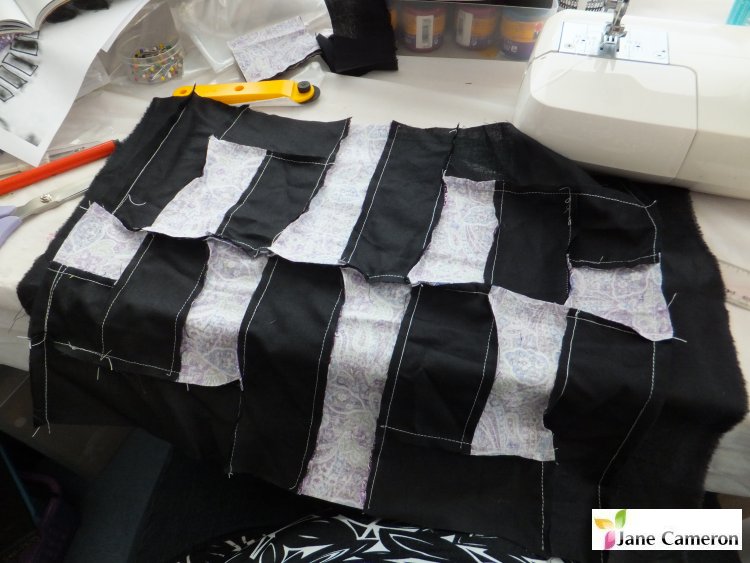
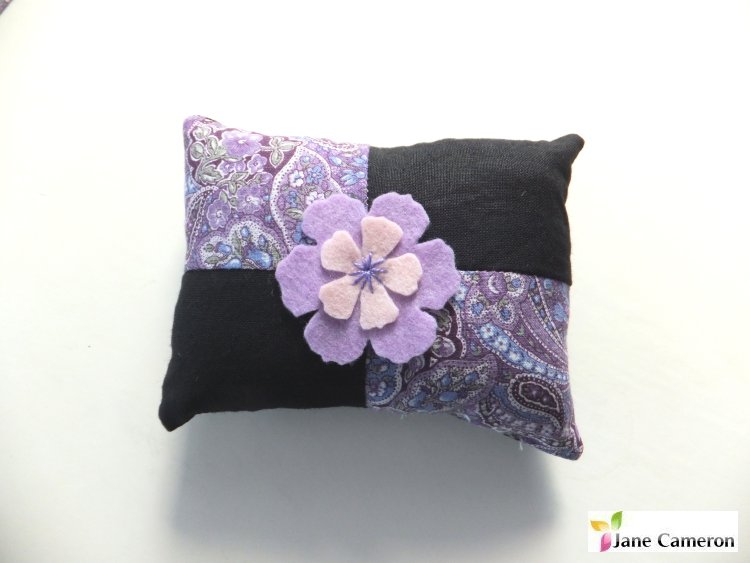
As I have a lot of black fabrics, and it’s that time of the year, it would be fun to make a Halloween quilt thing for the end of the bed. However, I decided to play safe and just make a cushion, as I had a rectangular cushion pad which needed using up and this block looked just right. Ironing your pieces, as instructed, will really help you with this project! However, I was upstairs and the iron was downstairs so that didn’t happen …! So, cutting and sewing the pieces was easy. The instructions were brilliant and clear enough that I felt really confident working on it. I’m really proud of what I achieved in an afternoon.
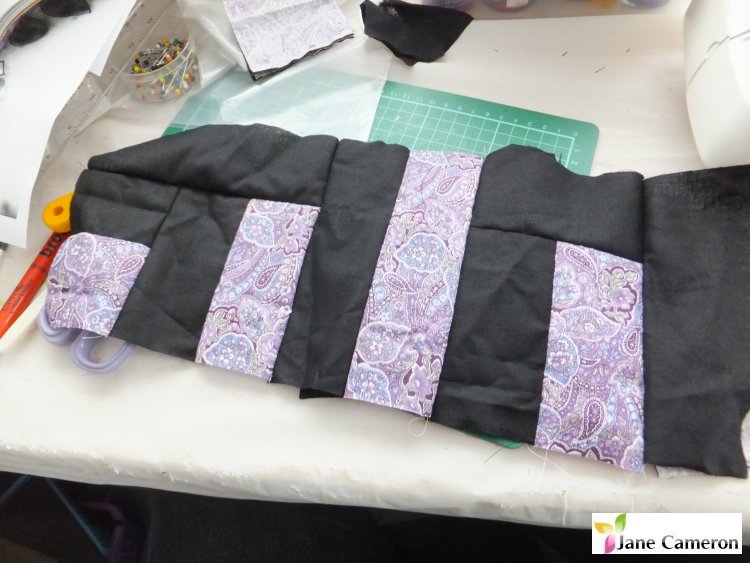
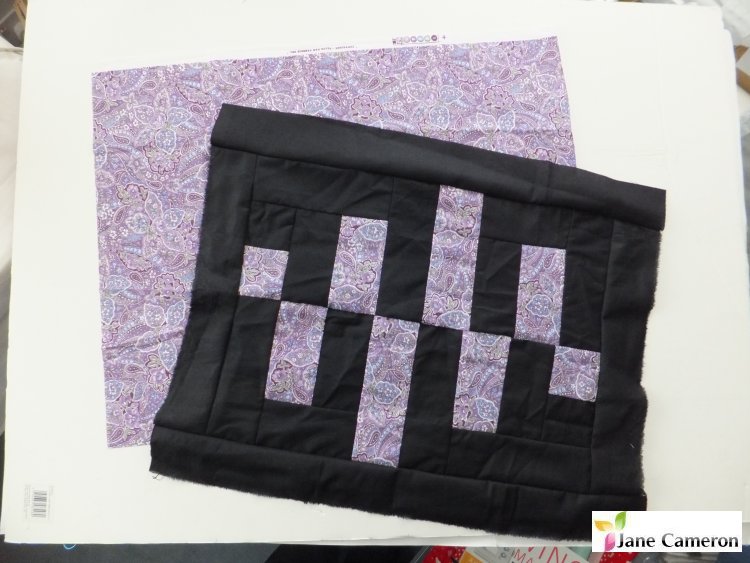
Having made the block, it was a bit too small to make a good cushion cover, so I decided to put a whole run of black all the way round – needed a strip and a bit – as this meant it stayed similar dimensions. I also then discovered that the remains of my pretty purple paisley FQ, which I’d taken two strips off to make the front, was a perfect size for the back!
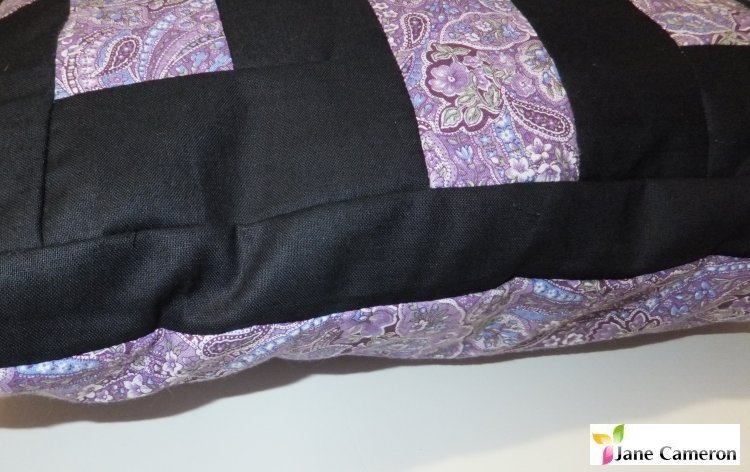
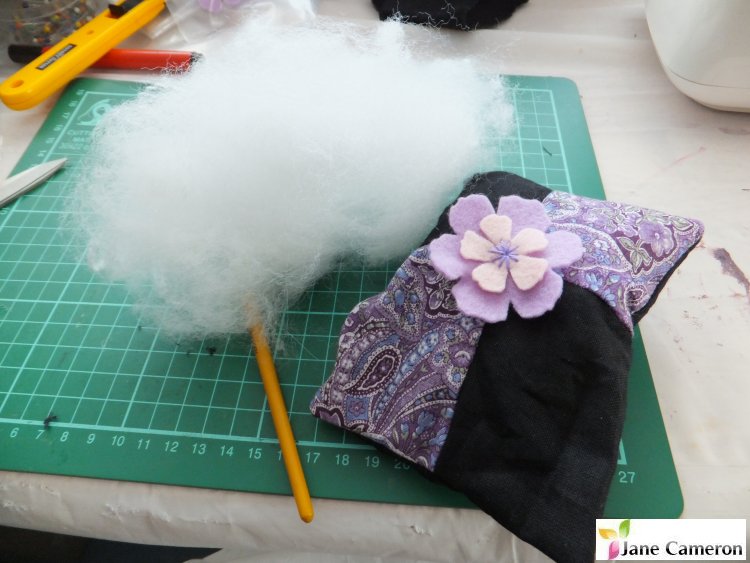
I had an absolutely awesome fun time making this and I LOVE my new cushion! I even managed to put in a zip! I also had just enough left over to make a matching pincushion ... Who would have thought it would need that much stuffing...
Learning points:
 Thanks so much to the lovely people at Search Press for my review copy of this book!
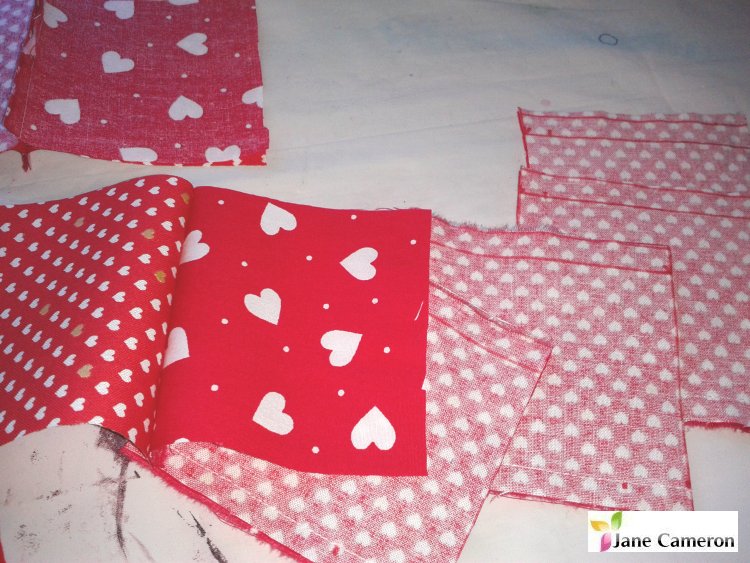
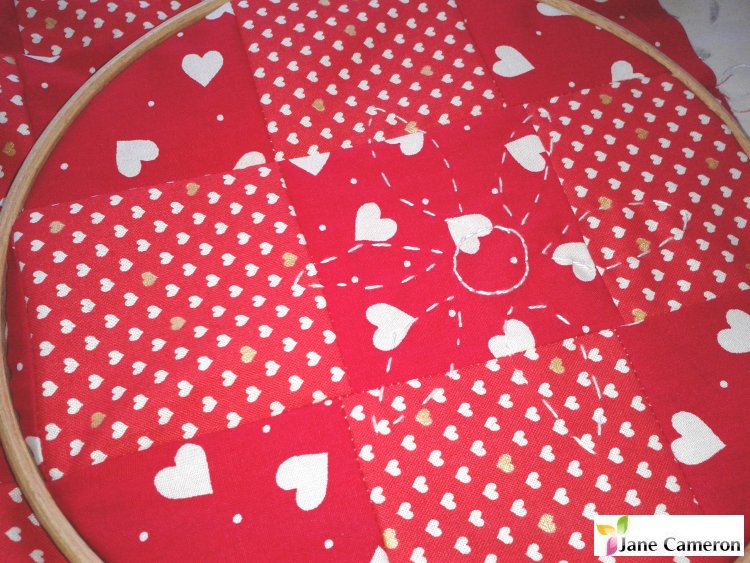
I used: Black fabric strips 2.5 inches wide by 42 inches. Patterned fabric 21.5 inches square. The Book: I was lucky to be recently given a copy of Quilted Flowers by Nikki Tinkler to review, thanks to my lovely colleagues at Search Press. Here's what they have to say about the book: "This book explains how to make 20 simple quilted flower inspired gifts, including cushions, bags, a wall hanging, a quilt, needlecases, greetings cards, a table runner, bunting and much more. Each project in this book is accompanied by a beautiful, full-colour styled photograph of the project together with a close-up detail; clear, step-by-step instructions; a list of the materials and equipment needed; and diagrams and templates where required. All the basic techniques are explained at the beginning of the book, making this an ideal book for beginners as well as more experienced stitchers looking for inspiration. • There is nothing quite like this book on the market, making it the first point of call for anyone interested in quilted flowers • 20 beautiful, unique projects to give away as gifts, or to keep for yourself as a wonderful treat • Clear step by step instructions make the quilted flower projects accessible for beginners, with plenty to inspire the more experienced" 64 pages. RRP £7.99 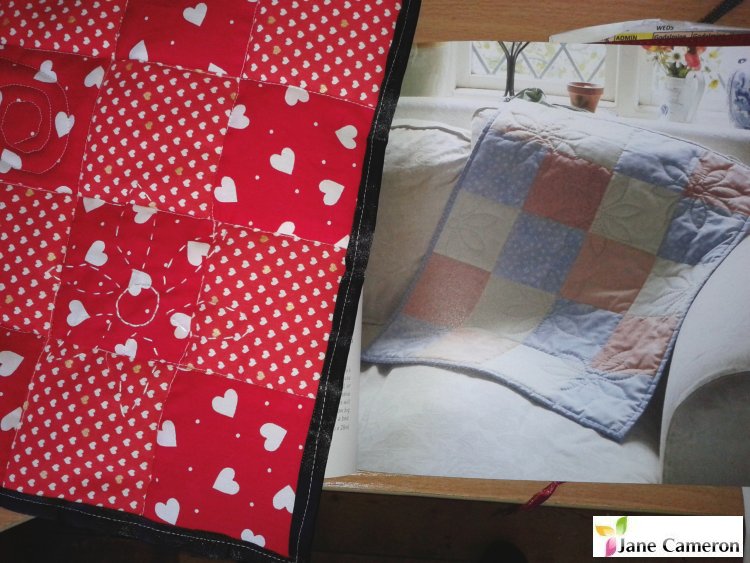 My review: This book is part of Search Press's "Love to Sew" series, which currently has about half a dozen titles. The projects themselves look quite simple, and it looks like a good way to use up offcuts from your fabric stash. The book looked nice when it turned up - square format, sturdy papery pages with the products nicely photographed in lifestyle settings. The book is well presented with materials, instructions, project pictures and some tips on each double spread. There are no progress pictures though, only words, which some people might find tricky to follow. I thought I'd try out one of the projects to see how easy / hard it was. Small projects are also a great way to support local makers and fabric designers, as even if you just buy a fat quarter from them it can go a long way! There's some good information at the front - it talks about the different types of wadding for hand and machine sewing - I didn't know there was a difference ...! There is also a helpful double spread showing how to do a range of hand stitches for sewing and embellishment, and a set of templates in the back of the book. I decided I would try out the first project, which is the "Mini Daisy Quilt". This is a 16-patch mini quilt with stitched daisies and an edge binding, which should come out about 2ft square. Thankfully I have a sewing machine, so I hoped this wouldn't take me too long. Experienced patchwork people may want to look away now ... a certain amount of unorthodox technique happened during the construction of this piece!
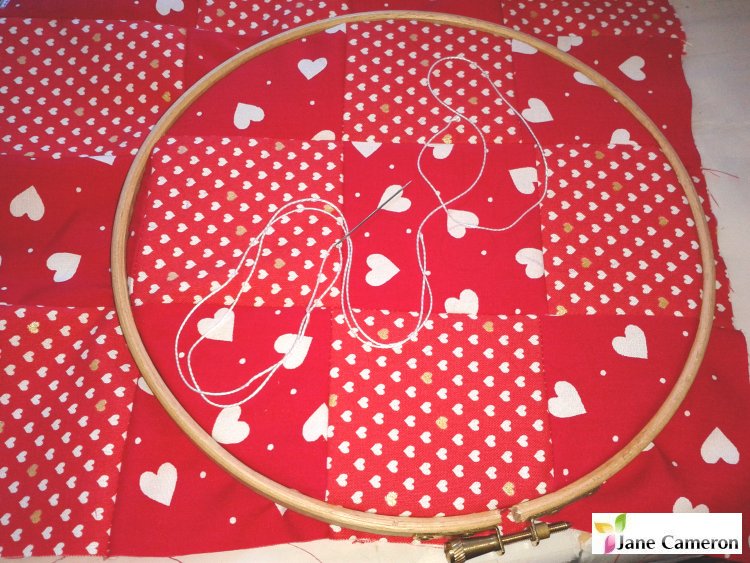
As a novice patchworker I liked the way it suggested the colours I could use and told me how many pieces of each I would need. I decided to use some random fabric I had, and to make the squares a bit smaller, as I knew I didn't have much wadding and wanted to do it that day! I had also never done edge binding before and was a bit nervous! So, the instructions were fine - the fabric marking pen though fades INSTANTLY - suggest using something else like tailor's chalk which will stay on, or using a temporary stitch to mark the centre of each template so you can trace them on properly just before you embroider! I put my piece of patchwork into an embroidery hoop as I thought that would give me a better chance of sewing more even running stitch - I think it worked... If I did this again, I would do more embroidery on it, and use a less patterned fabric so it would show up more.
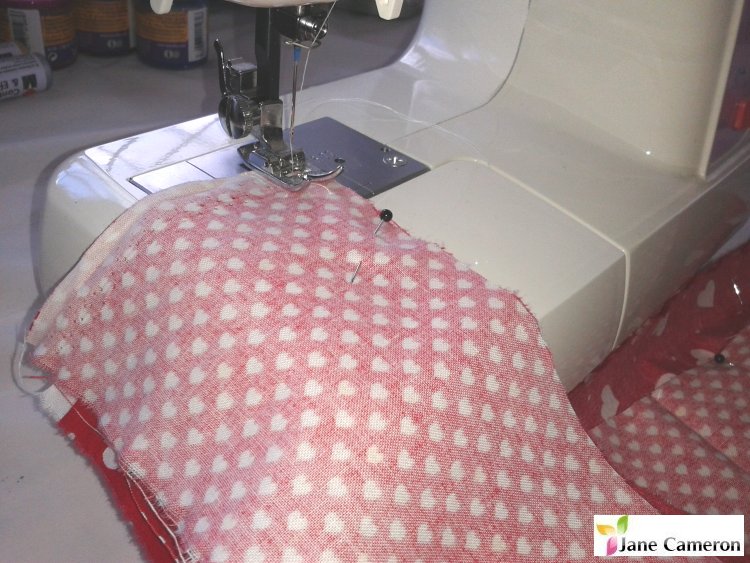
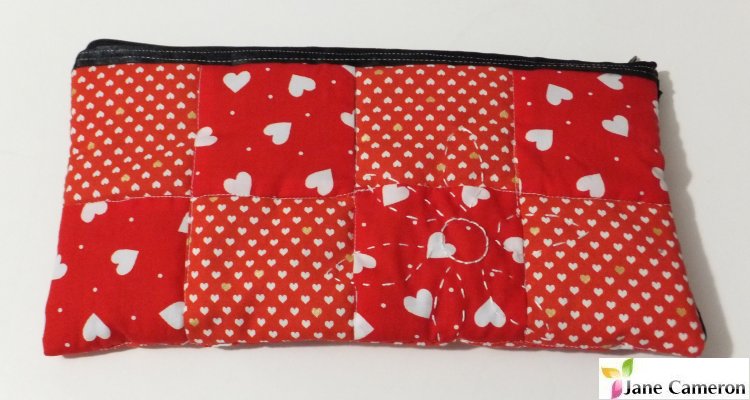
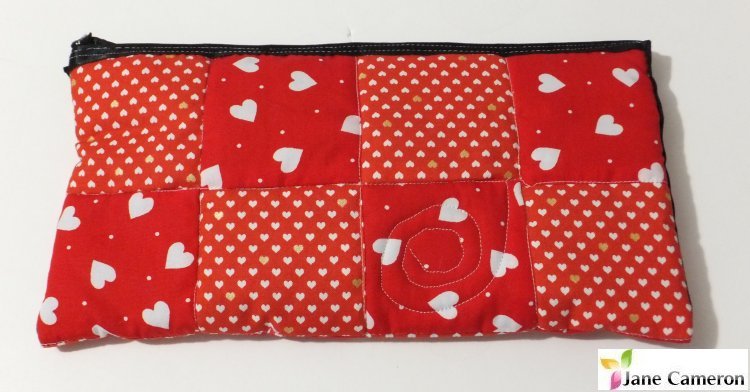
Machine quilting all the lines outside the flowers was fine - I used an awful lot of pins to keep it in place - I'm not sure whether this would have been easier or harder with larger squares ... I started in the middle and worked my way outwards, which it didn't tell me to do, but I thought it might be a good idea as I was scared my wadding was going to run away! I did have to remember to seal all the ends of the stitching rows before skipping over the flower petal, which was a bit annoying. This would probably have come out better if I'd used a rotary cutter for my pieces rather than a ruler and scissors - as they didn't quite line up so this made the "stitch in the ditch" harder. I also did a couple of rows of zig zag stitch around the edge of the whole thing before tidying it up, to make sure it would stay relatively square - the outside corners were flopping around quite a lot, even with pins in. Yes I know I was supposed to do tacking stitches all the way across it, but that wasn't going to happen! I wasn't in the mood for tackling doing binding strips, and had it in my head that these would need to be bias cut (but on reading the instructions again they don't have to be), so I used wide satin ribbon instead and just sewed it on from the outside. I quite like the row of little stitches! There is another, better, explanation of how to do binding at the front of the book in the "Basic Techniques" section which I found later, so I might give it another go some time. 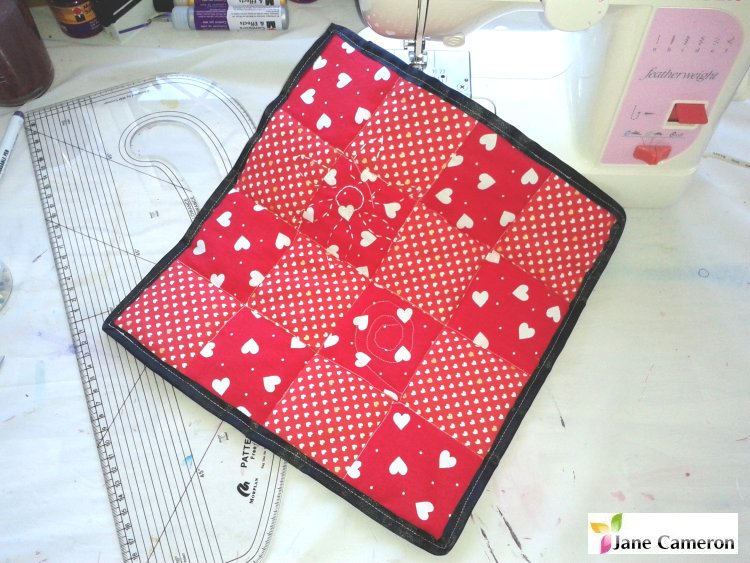 My finished piece was approx 30x30cm and used 2x10cm strips of cotton fabric, 30x30cm of wadding, about 1m30 of black satin ribbon and a piece of old t-shirt for the back! I used crochet cotton for the flower. The one thing I don't like about my piece is the gaps in the grid lines on the back where you had to leave room for the flower petals to come through. It looks really bitty. I think I'm going to go back and fill those lines in, and never mind about the whole "Petal effect" thing... It's fun the way it goes across the boundaries between the pieces, but I think it looks messy without the full lines of stitching, given you get a pattern change along the line anyway. PS - I just realised why my flower looks weird. I embroidered it on to the top fabric before I assembled the quilt, rather than doing them through all three layers for that 3D effect! Whoooops! All in, this took me about 2.5 hours, and was quite a fun way to spend an afternoon. It was really nice to have a project which I could completely finish in a few hours, so if the rest are like that then I'd thoroughly recommend this book. I am impressed at how good my teeny little quilt looks, given I didn't follow the instructions anywhere near precisely ... More experienced stitchers will, of course, get more professional looking results! I then decided it would be a good thing to have something I could actually use, so I turned it into a pencil case instead! There are a good range of projects in this book, ranging from a simple felt applique card using blanket stitch through to an embroidered and quilted Christmas table runner. Some nice ideas which could be easily translated into projects of your own. You can get this book here: http://www.searchpress.com/book/9781844488476/quilted-flowers 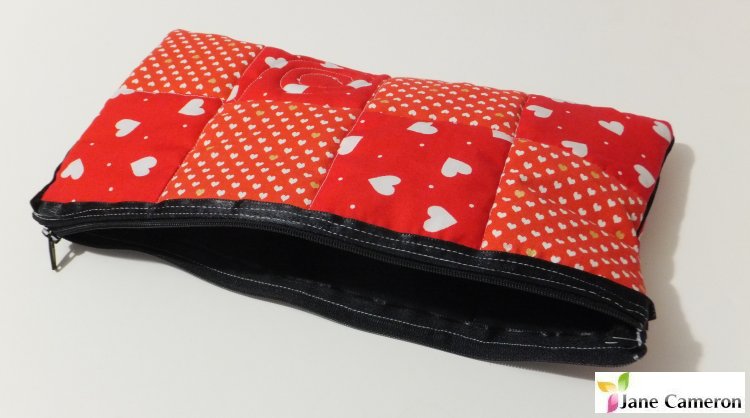
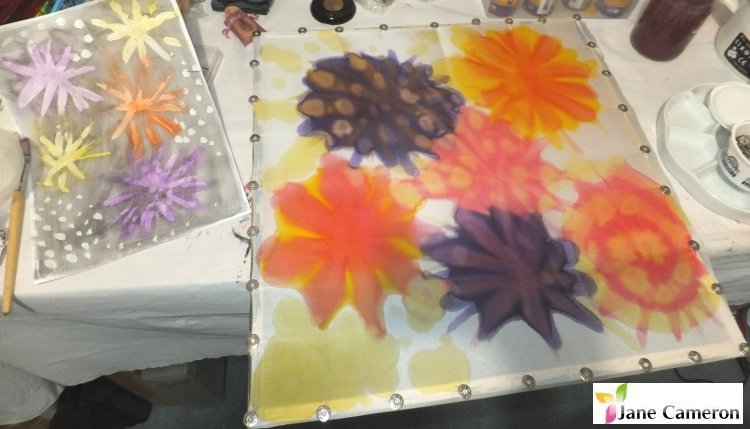
Last week I got quite excited by the shape of Star Anise! 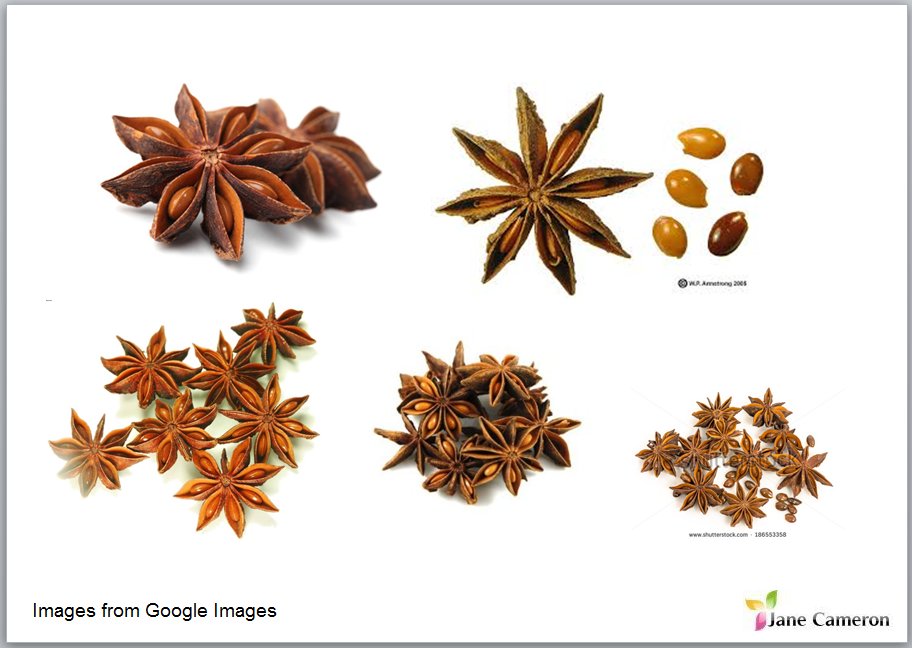 Fun with shapes! I decided that I would paint some on an 18” square, which I could use as a cushion cover, or cut up if I hated it(!). This would also be a good trial piece for a larger scarf. I decided to go with quite a free approach to the outliner this time, so didn’t do myself a pattern beforehand and just “went for it” and drew directly on the silk with the outliner. I thought that the background would be more fun if it was patterned rather than plain, so I extended some of the points of the seed pods into long lines so they would intersect and give me a nice geometric pattern. 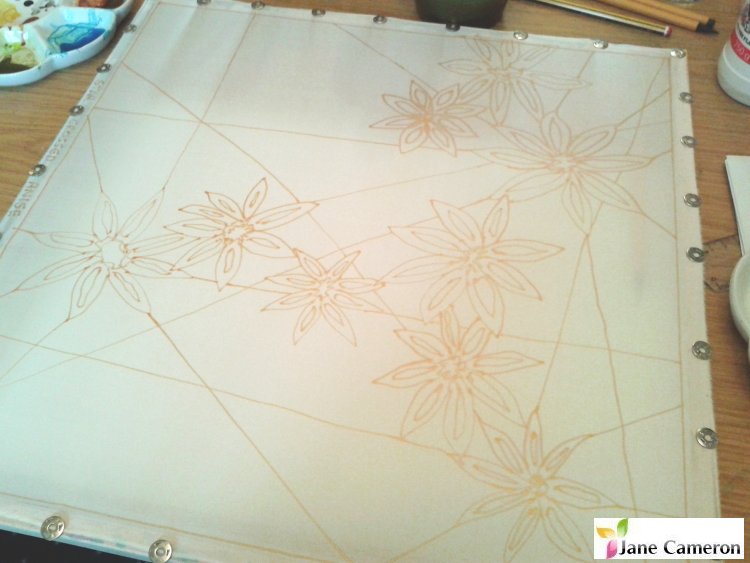 Because of these lines, I decided to call this piece “Star Crossed Anise”, a reference to Shakespeare’s Romeo & Juliet, which I was reading a little while ago. It’s amazing how a plan comes together! I decided to stick with brown for the seed pods. 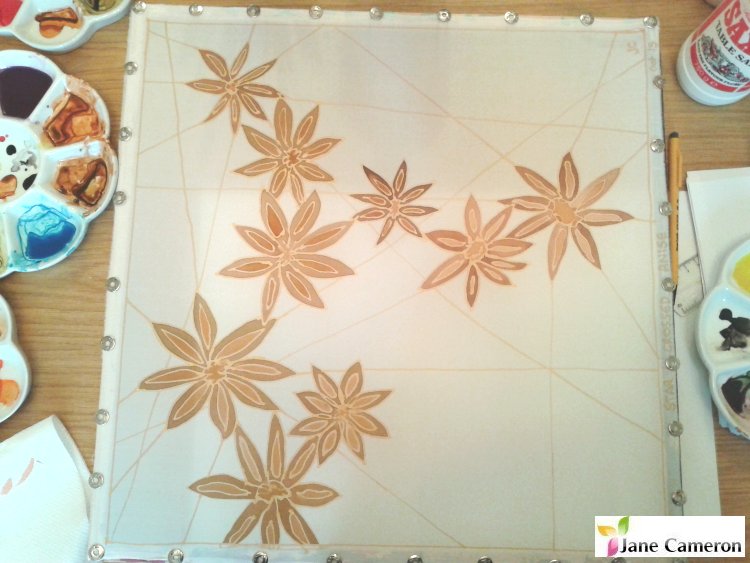 I love the different shades of brown, but it was a dull afternoon and I wanted something to spice it up! Thankfully I’d run a one of my Beginners Courses that day, so had some paint left in the palettes – time for a rainbow extravaganza! 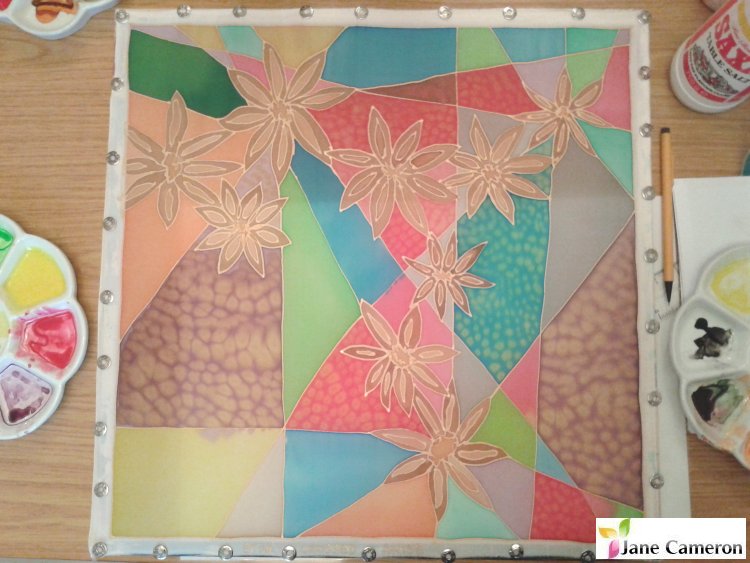 Next time I will draw my long lines a bit slower (and possibly use my special ruler technique … more on that another time!) as although they looked fine on initial inspection, a couple of them weren’t quite strong enough to hold back the paints when I started in with the texture techniques … something to bear in mind for future paintings! I will definitely be doing some more work inspired by star anise, as I love the shapes! Hope you’ve enjoyed seeing a little bit of my process. Happy creating! Jane. About Star Anise Illicium verum (star anise)
Star Anise is an evergreen tree and produces an essential oil containing anethole, which is used for flavouring drinks and confectionery and also in Chinese traditional medicine. It is thought most likely to be native to southern China and northeast Vietnam and has been cultivated since about 2,000 BC. Star anise fruits are harvested just before ripening, when the essential oil content is high, and used to produce a spice which is similar in flavour to aniseed. Star anise is widely used in Chinese, Indian, Malaysian and Indonesian cuisines and is one ingredient of Chinese five spice. It is also cultivated as an aromatic ornamental in tropical climates, on account of its small, scented flowers and fragrant leaves. http://www.kew.org/science-conservation/plants-fungi/illicium-verum-star-anise Thinking about the experimental process ... it's a wonderful thing! I spent several hours at the weekend sitting with a pad of paper and drawing leaves, both real and fantasy. At some point I will use them as the basis of some new work. This time I only used pencil on lined paper, as it was what I had in front of me, but you could try a range of different pens, pencils, colours, and different papers too. If you're feeling exciting you could do a collage (a great way to recycle your junk mail - pizza toppings make fantastic textures!), or paint something, or even go the whole hog and paint a full colour background on your page and then draw on top! Keep your scribbles, even if they end up in a shoebox under the bed rather than in a scrapbook or sketch book. If you get low on inspiration then just go and take a look in your box - you'll soon find something which excites you! You may never use them, you may use them months or even years later, but remember to keep creating. Everything you do helps you to grow as an artist, to hone your physical and mental artistic skills. A box can be a great thing, when used alongside traditional sketchbooks, especially for those who work in 3D. Little luggage labels can be attached to objects so you know when/where/why you chose them. Taking photographs also helps to develop your eye as well as your technical skills, doesn't take up space, and can give a wealth of inspiration for future projects. Try taking photos from different angles, or of close up bits you would not normally give a second glance. I quite like drain covers - there are so many fabulous geometric designs which can be tweaked, coloured, embellished and tesselated for borders and abstract work! Now is a great time to collect and press some leaves, and take pictures of those gorgeous autumn colours and sunsets. These lovely warm colours, reds, oranges, russets, will keep us going through the depths of winter until the snowdrops come again in the spring. I leave you with one of my favourite quotes:  |
Jane Cameron
Experienced silk painter, glass fuser, teacher, enthusiastic and inspirational. Archives
June 2019
Categories |


 RSS Feed
